Saturday, August 31, 2013

Saturday Weekly Wrap Up 33

Summer is coming to an end for some of us at the Inspiration Cafe, while winter is fading for  a few of the others.  Either way, I think we're all happy about our change in the seasons! 
Here's what we've been up to on our own blogs this week.....

Natalie at NorthShore Days


 Heather at The Beating Hearth


(Don't forget to go over and link up to this Freaking Awesome Party!)


Danni at Silo Hill Farm


It was Heather's turn at the Inspiration Cafe's "Kidding Around Series"


Inspiration Cafe is looking for guest posters and contributors. If you would like to guest please let us know, we would love to have you. If you would prefer a feature instead, feel free to drop us a line. New or old posts welcome.

Friday, August 30, 2013

HERBS: A PLACE TO BEGIN - Stone Cottage Adventures

It is so much fun to be a monthly contributor for Inspiration CafĂ©!  Another month has flown past me!  Where did August go?  Quick introduction!  My name is Marci and I blog at Stone Cottage Adventures. 

Green 
Text Button
 
I'd like to tell you about a little series of posts I've been writing!

Being part of our county's Master Gardener Speakers Guild is a lot of fun. My program is titled "Herbs: A Place to Begin". It is for anyone who might be curious about growing herbs or is just beginning to use them. I give simple advice for ways to incorporate tasty herbs into your every day life. After such a sweet reception to my presentation, I will be adding regular posts about herbs.

 photo 
e93e8cb5-d187-4056-a81d-fb412717ab3c_zpsfd21478a.jpg
Watch for the ones titled "A Place to Begin".
Herbs are amazing in so many different ways.  You can just snip and enjoy them!  Do you know they are delicious in salads?  Think about the herbs you add to recipes that are cooked.  Those same flavor profiles are delicious raw in a salad.  Just snip and enjoy!  I hear this question all the time:  What herbs taste nice with what ingredients?

Keep in mind that some herbs have a mild flavor, while others pack a punch!  The milder ones can be added as whole leaves.  The power hitters may need to be finely chopped and just sprinkled here and there.

EarlyDecember030

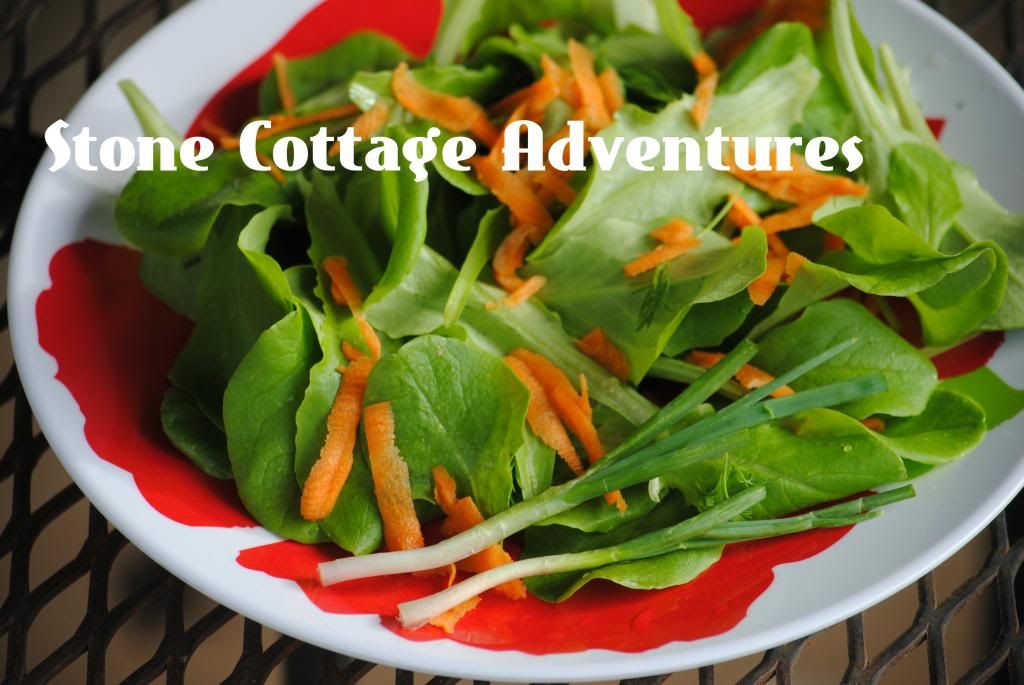
This simple winter salad has a little dill in it.  I used regular ol' Ranch dressing on top.

If you attempt The Mother of All Summer Salads (It's really very easy!) you might consider adding something citrus-y like marjoram or lemon balm.  Would you prefer a savory herb?  Basil is amazing with berries.  Do you know that rosemary is yummy with oranges?  There is another option for this amazing salad from Danni at Silo Hill Farm!


Source

 Do you like taco salad?  Cilantro could be added.  Cilantro has a bold flavor.  Depending on your palate, it might need to be finely chopped.

Let me say it again.  Think about the herbs you add to recipes that are cooked.  Those same flavor profiles are scrumptious raw in a salad!  Just snip and enjoy!

Are you curious about other simple recipes using herbs?  Take a peek at my Recipes Page!  If you are interested in growing herbs, there are quite a few tips on my Gardening Page!  I'd love for you to visit my Stone Cottage each week as my little series continues.  If you are new to herbs,  I can give a place to begin!

;-)  -Marci

Thursday, August 29, 2013

Shoe Makeover - Mother Crafter

 We're so excited to have Vanina from Mother Crafter here today to share her awesome shoe makeover...

Did you know that the original TOMS shoe are called "alpargatas" and are the characteristic footwear of "gauchos", the cowboys of Argentina? They are an Argentine trademark, and you can see them everywhere, worn by all kinds of people, from teenagers to the elderly, rich and poor . I love alpargatas. The other day I realized one of my beloved pairs is ripping on one side. I knew I had another pair in the closet. The problem is, they are camouflage print. I bought them a couple of years ago when I was back home, even knowing I was not going to wear them often because I do not like camo print. But they are really comfortable and it was that or black ones in my size (I already had them in black) so I bought them anyway. And of course, I barely used them, until yesterday, when I decided to paint stripes on them. So for this new tutorial, I will show you how I did it. 


You will need:
  • A pair of shoes, preferably canvas.
  • Metallic silver acrylic or fabric paint.
  • Black acrylic or fabric paint.
  • Brushes
  • Newspapers and drafting tape.
Photobucket

Start by stuffing the shoes with newspaper so they are firmer and easier to paint.

Photobucket

Cut strips of drafting tape and cover the shoes placing them at an angle at about 1/2 inch apart or the width of the tape. I chose to go all the way to the mid-sole too. 

Photobucket

Paint the stripes with the metallic silver color, trying to be as even in the paint distribution as possible. (If you are using different colors than mine, paint the lightest color first. That way you can paint over with the darker if your stripes are not perfect or you have run-over paint.) You might need more than one coat if the original color of your shoe is dark. 

Photobucket

Let them dry for a couple of hours outside. 

Photobucket

Peel the tape. 

Photobucket

Paint the rest of the stripes with black and let it dry once more completely. Check if you have any chunks of paint and if you do, try to remove them with an X-Acto knife. Put them on and take them for a stroll! :) 

Photobucket

You can find me on Facebook, Twitter, and Pinterest!

Tuesday, August 27, 2013

JUNKIN JEWELS ARE COMING TO THE INSPIRATION CAFE!


Once again, we have some exciting news here at the Cafe!  We have an awesome round up of great bloggers who specialize in creating some pretty amazing stuff from junk...be it vintage or other.  I don't know about you, but I am always in awe of these transformations and I was thrilled when these ladies agreed to come together and share their talents on the second Tuesday of every month right here at the Inspiration Cafe! 
A special thanks to Donna at Distressed Donna Down Home for bringing all of these ladies together and convincing them to share their great projects with us.
So just who are these Gems in the Junkin Jewels??  Well..lets start with Donna.


In her own words.... "As a lifetime junk collector, I am always on the hunt for the rusty, crusty, and vintage treasures that lurk about in dark corners begging to be transformed.  I am a Rust Goddess - Southern style!"
Donna at Distressed Donna Down Home
Here is one of Donna's favorite posts...
Signs of Vintage Photos
I have been on the lookout for some of those sign frames ever since I first saw that wonderful post!

The next Gem is Denise, from Spittin Toad.  I love that blog name by the way...Spittin Toad!
 Denise says: "I love art, junk and all things vintage...When I can put them all together and create something new...Well, that just makes my heart sing!!"

Denise from Spittin Toad
 Denise has a ton of fabulous projects, but here is her favorite.

Suitcase Side Table
I love this project and the idea of hidden storage in such a beautiful piece!

Many of you may be familiar with our next Gem in the Junkin Jewels...It's Tuula from The Thrifty Rebel!
Tuula is so cute and funny!  Here's her short bio..
"I've been a thrifter since I was born. I inherited the gene from my parents through no fault of my own. At the age of four I cried my way into getting my first thrift store treasure... a beautiful blonde haired doll that I still have, and I was hooked for life. I've been reusing, repurposing, and upcycling ever since, and I don't cry for my treasures anymore. At 52 it's not such a good look, and crying makes frowny wrinkles."
 
Tulla has made some fabulous garden art out of her thrifting finds, so I wasn't surprised when she chose this as her favorite project.
Silver Goblet Windchimes

Believe it or not...we have another gem in the Junkin Jewels named Denise!
Denise says,"
 I'm a mom of two sweet and funny kids, a graphic designer and most definitely a junk-junkie! I love to create pretty things out of just about whatever I can find! With tons of help from my special man, Eric, I create home decor and refinish old furniture for our little business that we call On a Whim.
Meet the fabulous Denise....
Denise from Denise...On A Whim
 And the favorite project of this very creative junkin mom of two??
Message Center from Repurposed Crate Lid
How fun and clever is that?!  That little message center has a little bit of everything and I love it! 

There may be a few more of these marvelous ladies joining in a little later.  But for now, please pay these ladies a visit and welcome them to the Inspiration Cafe.  We'll start our series Tuesday, Sept. 10th and Donna from Distressed Donna Down Home will be leading off!    

Sunday, August 25, 2013

Kidding Around Series~Black-Out Scrape Pages

Hi, everyone!  It's Heather from the Beating Hearth here for my turn on this fun series!  I instinctively decided to do an art project for this series because my kids make a lot of art at our house.  A lot.  In fact, so much so that Daddy quite often has to take their art to...we'll call it "work".

I guess I don't know what these are really called.  So I am calling them black out scrape pages.  You'll see what I mean in a minute.  Trust me, they are a lot of fun...and a good way to keep kids occupied for at least 10 minutes.  Maybe 20 if you're really lucky!

1.  Color all over a piece of card stock with a rainbow of colors using crayons.  It needs to be heavy-duty paper because you are going to scrape away the layers of black crayon with a nail. 

2.  Once you have covered the entire page, cover over your beautiful colors with a heavy coating of black crayon.  Thick.  Try and cover up the previous layer completely and thoroughly.

Start scraping away at the black crayon and exposing the rainbow colors underneath.  When you create, keep in mind it's fun to play with light and dark.    And just start scraping.  Anything goes!  I would recommend scraping over newspaper...the black wax gets everywhere.  The girls had fun and so did Mom!

Don't forget to join us next week for more fun shares for our "Kidding Around" Series.  Also, be sure to join us for our link party that's coming up in a few weeks!


Thanks so much for stopping by!


Heather


Saturday, August 24, 2013

Saturday Weekly Wrap Up 32

Hello everyone, how has your week been? 
Isn't great that it's the weekend? 
Yay!

What have we been up to this week?


Natalie at NorthShore Days
Name the Bracelet


Heather at The Beating Hearth


Danni at Silo Hill Farm
Fall Recall for Y'all!


Simple Earrings
My First Dress!!!!
Silhouette Toiletry Bag
The Year of Bloglandia Perfection


Don't forget to join us at Mel's new LINK PARTY running every Friday


It was Mary's turn for the Kidding Around Series this week ...

Awesome Ice Cream Toppings from the Pantry

Have a great weekend

xxx
 Nat, Mary, Heather, Danni and Mel
 
Inspiration Cafe is looking for guest posters and contributors. If you would like to guest please let us know, we would love to have you. If you would prefer a feature instead, feel free to drop us a line. New or old posts welcome.
 

Friday, August 23, 2013

Lacey Flower Headband - Mammy Made


Hi everyone. I'm Adele and I live in England with my two gorgeous babies, Leyla who is 4 and Naomie who is 2. I am so excited to be contributing to Inspiration Cafe again today!


I usually blog over at Mammy Made. I like to write about crafting, cooking and homeschooling, although I am only homeschooling part time at the minute. I have tons of tutorials on there so come by and say hi, I’d love to see you! I am also currently blogging about growing vegetables in my small back yard so come and check that out if you would like to give it a go :)


This month I want to share a cute little headband I made for my youngest daughter last year. I wanted a nice quick and easy craft to do during naptime and I had this stretchy lace that I had been dying to make into a headband with a something on. I cut my stretchy lace to 16.5" since that was just nice on my eighteen month old's head. You want it to be a little bit stretched when it is on or it will fall off. Cut your lace to your baby's head measurement then you will lose some of that length when you overlap your pieces to glue together. This should make the headband just the right size to fit nicely on your baby's head :)


Heat up your glue gun then apply a dot of glue to one end of the lace. Make sure your lace is not twisted, then press your second end onto the glued end. I held mine together with a peg so I wouldn't have to do it with my fingers and potentially burn myself.

I left mine to dry then double checked it fit my little girl's head. Feel free to make adjustments here if it is not a perfect fit.


While I was waiting for my glue to dry, I started making the flower. I used some hot pink DK yarn I had lying around and a 4.5mm crochet hook.

To make the flower:
1. make a magic loop, ch3 and work 11dcs in loop, join with sl st in top of ch 3 (12)
2. ch1, turn, sc in same st, *ch4, sk1st, work sc in next st* around, end with sl st in 1st sc
3. ch1, turn, work (sc, hdc, dc, dc, hdc, sc) in each loop around, join with sl st in 1st sc, bind off and weave in ends. (While weaving my middle end of yarn in, I attached a white button with a simple cross then weaved in a bit more and tied a knot to secure.)

Next I made the back of the flower using a 4mm crochet hook (I used a smaller hook so it would be slightly smaller than on the flower, I didn't want to be able to see it from the front) and the same yarn:

To make the back piece:
1. make a magic loop, ch3 and work 11dcs in loop, join with sl st in top of ch 3, bind off and weave in ends. (12)


Lay your flower right side down, lay the join of the lace on top, then add the back of the flower right side up. Either hot glue or stitch down. I stitched since this was my first time using the glue gun and I wasn't totally sure of my abilities ;)


And there you have it. A lacey flower headband :D

I hope you all enjoyed this tutorial. Thank you so much to everyone behind Inspiration Cafe for letting me contribute again. It's been fun!