Wednesday, July 31, 2013

Personalised Birthday Favor Bag - Mother Crafter

Vanina from Mother Crafter is here today...


Last month I made drawstring bags to use as birthday favors for my friend Julieta's daughter, Emma, who turned two years old.

Mother Crafter Birthday Favor Bags 

She wanted to give bags that people could keep as a memento and use for other purposes as well. We were thinking of decorating them with a fish stamp because Emma likes fish. But then Julieta thought about making them more personal and let Emma paint on them. Brilliant idea! Super cute and surely a nice memento. So we went shopping for fabric and bought a nice rich purple cotton and orange and yellow ribbons for a dramatic contrast. And then Julieta bought fabric paint in those colors too.  

Birthday Favor Bags Mother Crafter
 There is a ton of tutorials for drawstring bags online, but I chose this one from In Color Order because a) it is very simple; b) it has great directions, and c) I liked the square bottoms. For the strings, we decide to go bi-color to make it more fun. They turned out gorgeous! Everyone thought the idea was mindful and unique, and they were so happy to get the bags with goodies inside. She put some bath toys and crayons for the kids, and yummy chocolate bon bons inside  the ones for adults.
MotherCrafterBirthdayFavorBags
 MotherCrafter-Birthday Favor Bags
Mother Crafter_Birthday Favor Bags

Aren't they adorable? Don't you think it is very special to have a toddler add his/her personal touch to the bags?

Mother Crafter Birthday Favor Bags

You can find me on Facebook, Twitter, and Pinterest!

Monday, July 29, 2013

BLOOMIN' MARVELOUS LINK PARTY

We've had a lot of fun sharing our garden-inspired posts with you here over the last month.....
Now it's time to link up yours!  If you have a post about gardening, garden art, recipes using garden produce, flower gardening or anything garden related, we'd love it if you'd link it up and share it with us!


Saturday, July 27, 2013

Saturday Weekly Wrap Up 28

Happy Saturday!
We hope you've all had a good week and are ready for the weekend,

Lets have a look at what we have been up to this week...


Natalie at NorthShore Days
Chocolate Fudge Dipped Cupcakes


Mel at Mellywood's Mansion
Blogger Swap

Memory Wire Bracelet and Earrings
Craft Room Bench


Memory Wire Necklace


Heather at The Beating Hearth
Picnic Rice Salad
I meant what I said


It was Mel's turn at the Cafe this week:
Melly, Melly, How Does Your Garden Grow

Don't forget its our next Link Party on Monday...be there with your garden inspired posts!! We can't wait to see what you link up.


Have a great weekend

xxx
 Nat, Mary, Heather, Danni and Mel
 
Inspiration Cafe is looking for guest posters and contributors. If you would like to guest please let us know, we would love to have you. If you would prefer a feature instead, feel free to drop us a line. New or old posts welcome.
 

Friday, July 26, 2013

DOG DAYS OF SUMMER! - Stone Cottage Adventures

Marci is here today from Stone Cottage Adventures...

We are total goobers when it comes to our dogs.  Here are four of them all snuggly on the couch.  From front to back, there's Missi Lu, Tobi, Abigail and Ivan. 
  
 photo 
96ad6d96-593f-47c3-813c-dade28efbf6b_zps31fc5912.jpg
Missi Lu is the oldest.  She sleeps in a heated basket right beside my bed. During the night, if I happen to roll over in her direction, I reach down and pet her, then go back to sleep.  Last Saturday, she had a doctor's appointment for some ongoing health issues.  (The poor thing has to be sedated before going to the vet, because, well, frankly, she's horrible.)  After two hours of tests and never mind how much money, we went back home.

 photo 1d950d8f-67c8-49c5-9d92-d474933a517e_zps1d65a15d.jpg  
That night, I rolled over and reached down to pet her.  Missi's skin felt cold and she didn't respond to my touch.  I was so sad.  I got out of bed and sat in front of her basket to pet her.  She did not respond.  I began to pray, thanking God for letting her die in her sleep, at home in her basket, with me by her side.  She has been such a good friend.  Handsome Husband wakes up.
Him:  What are you doing?
Me:  Missi is dead.
Him:  What?
Me:  She feels cold and she isn't moving.
He came over and sat next to me.  He reached out to pet her.
Him (kind of exasperated):  She's not dead!
He shook her and shouted her name.  My poor dog leapt to her feet all startled.
Me:  She's alive!
Handsome Husband stumbled back to bed grumbling something I couldn't hear.  I was too busy hugging my dog!

 photo f5e2bab6-5f81-43ba-bd04-9380540d63b6_zpse1625964.jpg

Her favorite treats were made in the morning.  This recipe is what I would consider for 'special occasions'.  You know, for those I'm-so-glad-you're-alive days.  Ahem!  The barley could be replaced with rice.

Barkin' Barley Bars

 photo 1022882b-9b6d-40d1-b372-8d263249cf37_zpscddfdf08.jpg

I usually make barley bars with leftovers, especially something left in the bottom of the crockpot.  Here's that recipe.

Barkin' Barleys with Leftovers

The kiddos around here enjoy making dog biscuits.  Our furry hoard LOVES eating them.

 photo a3a0bd74-fa7d-4c2e-b56a-341f08e5e398_zps7e456c35.jpg

Stone Cottage Dog Biscuits

If you don't have those ingredients, here is another option.

 photo 1b760428-1934-47d3-a675-a5012863f2ff_zpsf6345bac.jpg

Dog Biscuits with Oats  
 photo 
5052df52-93f2-417a-a94b-af7855feed78_zps0bf8a80a.jpg
You don't have to wait for a life and death experience to spoil your furry babies!
;-)  -Marci

Vegan Banana Pancakes - Mammy Made

Adele is here from Mammy Made, today...


Hi everyone. I'm Adele and I live in England with my two gorgeous babies, Leyla who is 4 and Naomie who is 2. I am so excited to be contributing to Inspiration Cafe again today!


I usually blog over at Mammy Made. I like to write about crafting, cooking and homeschooling, although I am only homeschooling part time at the minute. I have tons of tutorials on there so come by and say hi, I’d love to see you! I am also currently blogging about growing vegetables in my small back yard so come and check that out if you would like to give it a go :)


This month I would like to share a yummy pancake recipe I came up with last Summer. Before making the pancakes, I looked around a bit at other recipes. I had never cooked vegan before so I didn't really know where to start. There is a LOT of choice for substituting eggs and milk but in the end I went with mashed banana to substitute the egg and homemade almond milk (which I will put a recipe for at the end of the post) to substitute the milk. (I have since made this recipe using only water and it was still scrummy!) I also added baking powder and a little bit of sugar since most of the recipes I found had some in.


Vegan Banana Pancakes (serves 4):

2 unpacked cups plain flour

2½ tsps baking powder
1 tbsp sugar
½ tsp vanilla extract
2 x ripe bananas, mashed (makes just over 1/2 cup mashed banana)
¾ cup almond milk
¾ cup water

In a large bowl, mix together the flour, baking powder and sugar. In another smaller bowl, mix together the vanilla extract, mashed banana, almond milk and water. Pour the wet ingredients into the dry bowl and mix to combine. Don't be too worried about getting all the lumps out. I mixed mine until just combined with a fork and they came out lovely. The mixture will be thicker than a 'normal' pancake batter but so long as it is still pourable then just go with it. For bigger pancakes you could add more water or milk but you need the batter to be a bit thick for the mini ones so they hold their shape whilst cooking.

Heat some olive oil in a large frying pan and drop the batter into the pan (I made each pancake with two tbsps of batter spread around a little into a rough circle just to help them cook a little quicker). Fry on one side until bubbles appear then flip. Cook for a few mins on the other side and serve hot or cold. I managed to get 16 mini pancakes out of my batter, which was plenty for me and the kids with some spare!


I served ours with fresh fruit which made them taste sooo sweet but they would be lovely served with honey and lemon or even more sugar sprinkled on top. My brother had some with chocolate sauce and they are so nice plain aswell. Bear in mind though that some toppings may not be vegan if that is how you prefer to eat them.


Homemade Almond Milk

1 cup almonds (preferably raw)
water for soaking
3 dates, pitted
3 cups water
½ - 1tsp vanilla extract

Soak the nuts in a covered container in the fridge for about 6 hours. After soaking, discard the dirty water and rinse well. In a blender, mix together the almonds, 3 cups fresh water and the dates. Blend until smooth then strain through a muslin. Add vanilla extract to taste. Store in a covered container in the fridge for about 3 days. Shake well before using.

I hope you all enjoyed this recipe. I hope some of you try the pancakes and enjoy them! Thank you so much to everyone behind Inspiration Cafe for letting me contribute again. It's been fun!

Sunday, July 21, 2013

Bloomin' Marvellous - Melly, Melly, How Does Your Garden Grow?

Hi Guys,

Mel from Mellywood's Mansion and I'm really excited to share with you how we turned our pretty ordinary yard into our own little food bowl.

When kid 4 out of five came it was a big shock to us financially, we'd literally lost half our income and had an extra mouth to feed. So we really started researching all the best ways to save a few $$ and veggies gardening was one of those things that kept coming up. Living in a warmer climate means we can grow veggies year round, although winter is limited to beans, lettuces and Asian greens

We had no idea what we were doing, so basically this is a pictorial of how we started as newbies and transformed the yard into a productive garden.

We started small with a few pots and bought ready made seedlings, once we had a little confidence we started planting our own seeds.


Those little pots gave us so much joy that we decided to expand to the front of the block and bought a few raised garden beds. Planted and watched our garden grow. (It was around Christmas hence the candy canes)


When we moved into the "Mansion" there was already a huge, well established lemon tree, this tree fruits for around 10 months of the year. We supply everyone and anyone who asks...not to mention the thieves that climb the outside of the fence. Then we planted bare rooted apple trees and a tiny dwarf orange tree, which we finally got fruit from this year after 3 years.


The apples grew and we expanded our fruit trees to include peaches, nectarines, almonds and pears.


Then we made the decision to add even more beds and dug up the back with a little (actually a lot) of help from the boys.


Then we awaited the "fruits" of our labor. Julian named the back garden Pete's Garden for his father who passed away.


Unfortunately I don't have a lot of pictures of produce but here is a small sample.


All in all this is three years of work. We've read everything we could get our hands on, asked lots of questions and made a few mistakes but I highly recommend trying it. By starting small and increasing as we went it wasn't as overwhelming as we thought it would be and we now save $100's a year by eating from our own garden. In that time we have grown, tomatoes, potatoes, capsicums (bell peppers), chili, herbs, various fruits, cabbage, cauliflower, broccoli, corn, carrots, beans, peas and many more.

So Melly, Melly, how does your garden grow? With hard work, patience and a lot of fun. Also I've said "we" a lot, I started with the small area in the beginning but Jule's and the boys are really the brains and labor behind most of what you've seen, including the cooking!

Thanks so much for coming to the Cafe today, it's been fun to look back on how our garden progressed and I hope you enjoyed it and maybe it's inspired you to have a try at planting something.


Thanks for reading,

Mel xo


Just a reminder, our link party is coming up on July 29th where we are asking for you to link up all your gardening posts.  It can be about your flowers, vegetables, fruit, recipes using your fresh produce or something that has been inspired by gardens or nature.


Saturday, July 20, 2013

Saturday Weekly Wrap Up 27

Hey Everyone, 
We hope you have had a good week and are looking forward to a relaxing weekend.

Pop on over and visit our latest projects on our blogs this week,


Natalie at NorthShore Days
Fake Distressed Wood Candles


It was Mary's turn at the Cafe this week:
Garden Envy


Have a great weekend

xxx
 Nat, Mary, Heather, Danni and Mel
 
Inspiration Cafe is looking for guest posters and contributors. If you would like to guest please let us know, we would love to have you. If you would prefer a feature instead, feel free to drop us a line. New or old posts welcome.
 

Thursday, July 18, 2013

Edamame Succotash - Grace Grits and Gardening

This light recipe is perfect with summer seafood and barbecue menus.  Vegetarian/Vegan-Friendly/Gluten-Free - what's not to love?


Ingredients

1 cup cherry tomatoes
1 small white onion, diced
2 cloves garlic, chopped
1 package frozen edamame
1 cup fresh corn kernels
1/2 cup fresh parsley, chopped
1/2 cup fresh basil, chopped
Tablespoon sesame oil
1 diced jalapeño pepper (optional)
sea salt and pepper to taste

Method

In a skillet, stir fry onion and garlic in oil until softened (about 1 minute). Add corn and edamame and lightly stir-fry 2-3 minutes. 

Remove to a mixing bowl and let cool. Toss in cherry tomatoes, parsley, basil jalapeño, salt and pepper.

Refrigerate until serving.  

Enjoy!

talya
Grace Grits & Gardening


Wednesday, July 17, 2013

7 Items We Couldn't Live Without in Disney World - A Few Miner Adjustments

6 Things We Couldn't Live Without in Disney World

Remember how we made it to Disney and back with just 2 suitcases for 4 people for 7 days?
True story!
I got a lot of emails from people asking me about the size of our suitcases… they are medium/large, but fit in the overhead on the plane, so technically we didn't have to check them.
But our suitcases didn't just have our clothes.
There were a few other things that I couldn't live without in Florida.


{1} Ponchos
It rained almost everyday while we were there.
And I think that Disney World is the only place on the face of the earth where people go about their business in the middle of a thunderstorm… including going swimming. At home we would run for cover. We got our ponchos at the Dollar Store. They weren't as sturdy as the ponchos sold at the park, but they were $1 as opposed to $15. And they fit in my bag.

{2} Speaking of bags….
I used a smallish/medium bag with zipping pockets and an adjustable strap that I could where cross-body or shorten the strap and make it a waist pack. Hands free fun!
{Yep…I went all semi-fanny pack…and it felt so good!}

{3} Wicking clothes
It is hot in Florida.
{I know. Hi, my name is Captain Obvious.}
The days that I wore wicking shirts and socks were days that I was way more comfortable than when I wore cotton. 

{4} Stroller
My boys are 7 and 5. Too old for a stroller? Not for Disney. According to my mom’s pedometer we walked approximately 50 miles in 5 days!
The house we rented had a stroller available…what luck! The boys traded on and off, but one day we rented a stroller at the park so that they both had one.
Honestly, for the older kids the park strollers were better….they were sturdy plastic with bigger wheels that were easier to turn. And if you are hopping to another park hold onto your receipt and you can pick up another stroller at the new park on the same day for no extra charge! What a life saver!

{5} Glow sticks
It drives me bananas to pay $10 or more for glow stick products at theme parks.
I almost had a heart attack when my 5 year old bought a blinking light up Mohawk head band for $10 with his souvenir money.
But hey...it was his money.
{Has he actually worn it? No.
He says he doesn't want to look silly. Really?}
So I stocked up on glow sticks…again at the Dollar Store. It kept the kids busy while we were waiting for the Electric Lights Parade.
 
 
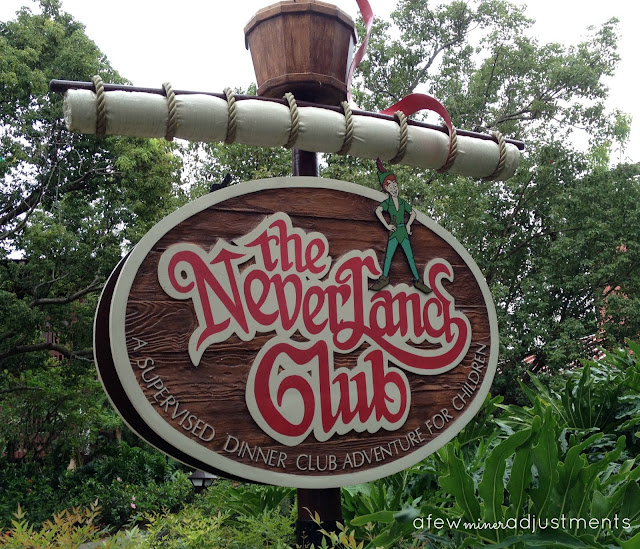
{6} Babysitting for the Kids And the most important thing that we couldn't live without on this trip...a parent's night out! But how do you do that when you want to go out with all the adults you are traveling with? Kid's Night Out...there are many resorts that over this. But the one we found was amazing....The Neverland Club. It is at the Polynesian Resort which is right at the main gates of Disney...walking distance actually. Plus you can get the bus to Downtown Disney from the resort. The kids can go frm 4pm-12pm. It is $11.50 per kid per hour.  {Totally worth it!}They are served dinner and the play and play and play. The kids had an amazing time. So did we!
 

What are some of your must haves for Disney World? I would love to hear, so I can add them to my list for our next trip.
PS...Before we went on this trip we also had a visit from a mouse...in our house! Most people would not think finding a mouse would be fun, but it was!