Showing posts with label Easter. Show all posts

Thursday, March 21, 2013

Naturally Dyed Easter Eggs - Grace Grits and Gardening

Although my nest is empty, I still love to dye Easter eggs. This year I decided to dye eggs using food and spices on hand.


I started with red onion skins, blackberries, cinnamon (ground & sticks), green onion tops and cilantro, beet juice and turmeric.

After boiling water, steep each ingredient for ten minutes while grinding and stirring the various ingredients to release the juices. Add 1 Tablespoon of white vinegar to each glass.


To enhance a few of the colors, I added a bit of ground cayenne pepper to the cinnamon, spinach leaves to the green and a splash of red wine to the blackberry. (Next time, I would not use green onions—spinach worked better.)
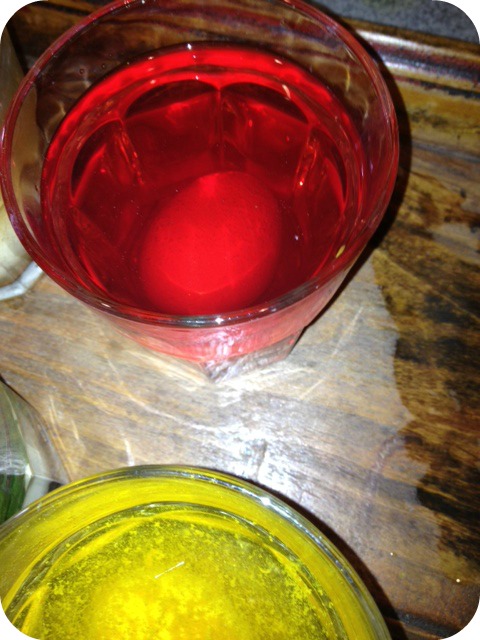

The beet juice produced a beautiful rose color. The turmeric was vibrant.

(left to right) purple onion, spinach/cilantro, blackberry/wine, cinnamon/cayenne, beet, turmeric
After soaking a couple of hours, my eggs turned a soft pastel color.  Soak in the refrigerator overnight for best results.

A word about boiling eggs: The eggs we buy today are very fresh (i.e. free range, etc.) The fresher the egg, the harder to peel—the white membrane is not mature and sticks to the shell. A teaspoon of baking soda in the boiling water will make the egg easier to peel. 

White eggs will produce the colors above. Brown eggs will produce different shades. Mix and match for more color variety.

And don't forget to use the eggshells in your garden. Crushed and sprinkled around flowerbeds, they will fend off slugs. Or mix with your soil as compost.

Happy Easter!

talya


Sunday, March 10, 2013

EASTER CLOCHE from SILO HILL FARM

Hello everybody, Danni here from Silo Hill Farm.  We've had some awesome spring-ish weather here at the farm the last couple of days and it's put me in the mood for some Easterness!  Today I'm going to share this Easter Cloche that I made.  It was so easy and you can always add whatever you have inside.


I should start by saying that cloches are abundant at thrift stores, cleverly disguised as cheese covers.  (I finally had to stop buying them because I don't think I'll need more than five, ever!)  Sometimes they come with a base and sometimes not.  In this case, not, but after scrounging around in the same thrift store, I was able to find several things that they fit quite nicely over.  For this project, I settled on a chunky black wooden pedestal that was probably made to hold a candle.  I spray painted it with just some white primer.


I made this awesome little garden arch last Easter.  You can get all of the details on how to make it HERE, but don't be intimidated by it because it really took me all of about 15 minutes to make.
I covered the inside base of the pedestal as well as the base of the arch with this awesome grass that comes in a mat.  You can just draw on the back and cut out whatever shape you want.


It's called Super Moss and I love it because it's easy to work with and it's always green.  This package is over a year old...still green.  You definitely want to use a newspaper or something to cover your work surface because this stuff is about as bad as glitter...it ends up everywhere.


Now that I had my pedestal and arch covered with moss, it was really just a matter of adding the extras.  A couple of small ceramic bunnies, a rock, a mix of faux flowers and some mini eggs from Hobby Lobby.  I wove some of the flowers through the arch and just clipped and stuck others in the cloche.  (Nothing in the cloche is permanently attached because, well, you know me...I'll be taking it all apart for some summery project later on.)


The flowers on the outside, were just two sprigs of faux flowers that I wired together and then attached with 2 little glue dots.  I really love glue dots for this kind of thing because they come off easily and if they take a little of the paint with them, I'll just hit it with some spray primer the next time I have it out. The center daffodil was attached to the 2 sprigs with a glue dot as well.


So there you have it, a pretty little cloche for the Easter holiday because.....hippity, hoppity Easter's on it's way!
            
Hope yours is so very wonderful,


Linking up to any or all of the fine parties listed HERE, HERE and....


Fluster Buster


Semi Homemade Mom
Photobucket
Gingerly Made
The 36th AVENUE
Serenity you
It's Overflowing