

Showing posts with label Crafts. Show all posts

Tuesday, December 10, 2013

Junkin Jewels - Snow Globes!

What a thrill it is to be here at the Inspiration Cafe!!  This is my first time being a guest blogger. So I hope I don't disappoint!

First of all let me introduce myself;  My name is Denise and I am a part of the "Junkin Jewels" series, here on the second Tuesday of the month....(Just love that name).  

Anyway, I blog over at Spittin Toad, so hop on over and see what my blog is all about (because even I haven't figured that out)  :) 
With that being said I had a tough time deciding what to share with you all....Snow Globes, Junky lamps or the TV we turned into a Fish Tank...


In the end the Snow Globes won out...After all "Tis the Season"!
Not to mention we had such a great time making them.  :)
I'm hoping this will inspire some of you to have your own creative little party!!
So lets get started;


The first thing I did was gather materials....
It was kind of like Christmas threw-up on my table...But who knew what this creative group of friends would need.....
Jars and snow and trees and....


Glitter and little ornaments both from the Dollar Store and garage sales....
Some of the trees I bleached some I did not...


It was so fun to see the different designs everyone came up with!!


Jessie put glitter on a reindeer (that was once a cupcake topper) by first coating it with watered down glue and then covering it in glitter...


She then glued it onto a delightful little dish from the Good Will...
added the tree and some snow and then placed a plain glass jar on top....
Added a ribbon, a pink poinsettia and she was done...Easy Peasy!!
Don't cha just love the combination of pink and green??


Gillian placed a Snowman in a tall canister adding some sheet music for the back ground....
Although the photo's don't show it well there is also a sparkly snowflake behind the little man...


Here's some of the girls showing off  their globes...

Isn't it amazing how uniquely different they all are?
Kory's is so sweet and tiny..


Gillian has her jar standing upright and Savannah painted a window on her's and had a little fire place, presents and a tree in it.  (I'm so sorry I didn't get a better picture of that one)!!   


I love the little red pom-poms going around the one above...
Autumn placed her jar on a vintage pedestal dish after painting Happy Holidays on it...
And...


I set mine on it's side...


So...What do ya think...Did you get some ideas??


I hope so!!


I also made a Snow Globe Cake out of a fish bowl...but that's a story for another time!!  :)

Thanks for having me!

Denise

Tuesday, November 26, 2013

Paint Dipped Soup Cans - Stow & Tell U

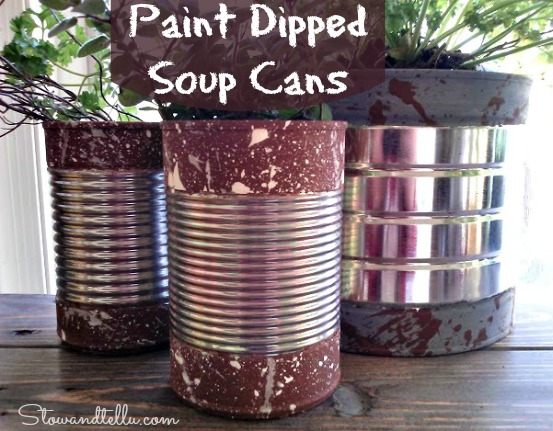
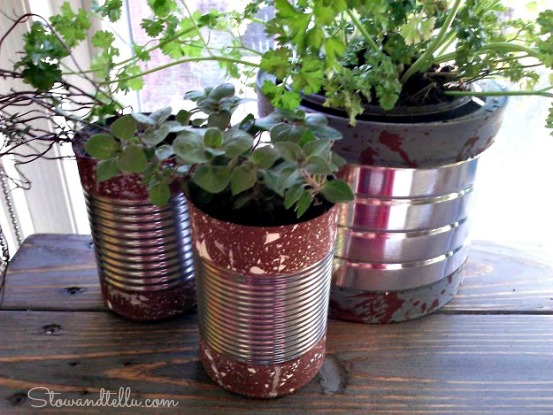
Hi All, my name is Amy and I blog over at StowandTellU. I'm so excited to be over at the Cafe today. I'm still craving some of those soup and sandwich recipes from the most recent Inspiration Cafe series, how about you? I plan to try them all, but I'll be honest, I'm not the best cook! Sometimes I'm better off opening a can of soup, rather than making homemade. Speaking of cans of soup, I have a little storage/planter idea for your herbs. It involves a few empty cans of soup and some paint dipping. Have you heard of paint dipping? It's a rather new to me, but Tara at Suburble has some gorgeous gold dipped ornaments, and that's what gave me the idea. Thanks, Tara!!
   
Paint Dipped Soup Cans with splatter paint texture-StowandTellU 

My dipping is a little more on the rustic side. What do your think?
  
 Paint Dipped Soup Cans with splatter paint texture-StowandTellU15 

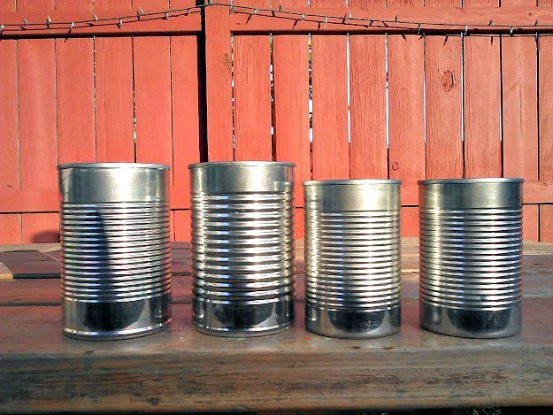
I used some small soup cans, some larger soup cans. Oh, and a coffee can, too 

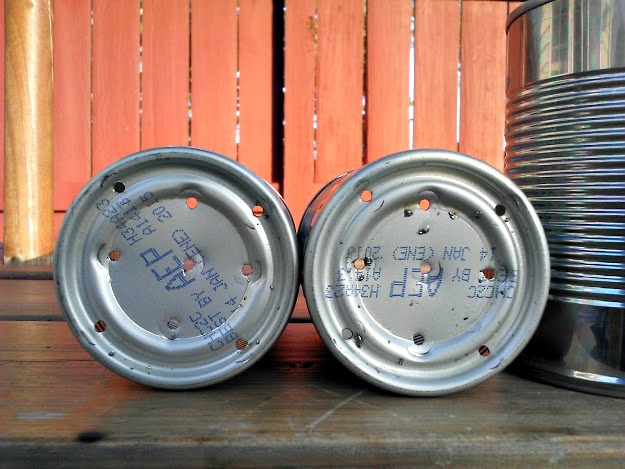
   Soup can herb pots-poke or drill holes in the bottom of the smaller cans 

I drilled some holes in the bottom of the smaller cans. I could have poked the holes with a small awl, as well, but I drilled these. I then replanted our herbs into the smaller cans. I used a plastic planter's pot for the inside of the coffee can. 

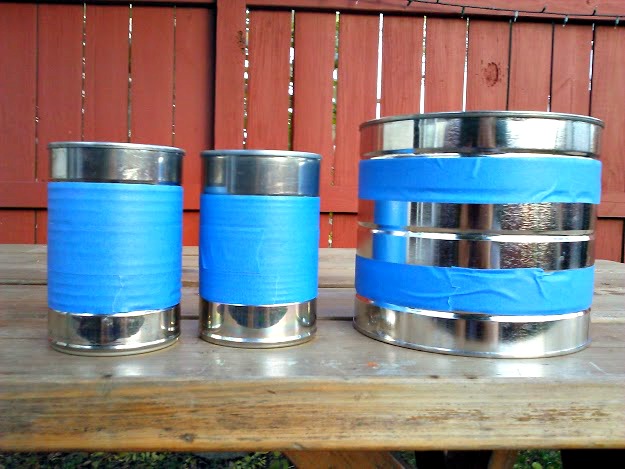
Soup can herb pots-tape cans of and paint
    

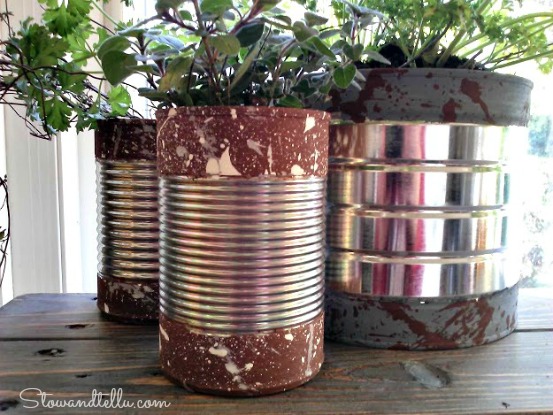
 I wrapped some painters tape around the center of the larger soup cans. I fully wrapped the center of the coffee can, too, after I took this picture. I applied some craft paint to the top and bottom sections. I also mixed in a little water and baking soda, which I think help to make the paint stick to the metal of the can. I let the paint dry. It looked pretty cool, but I thought it need a little something else. So, I decided to give it a speckled paint splatter texture on top. I removed the tape before the paint dried, and BOOM!! Pretty cool. Then I gave the painted parts a coat of paint wax, for good measure.
  
Paint Dipped Soup Cans with splatter paint texture-StowandTellU
Paint Dipped Soup Cans with splatter paint texture-StowandTellU10a
   

Paint dipped and speckled soup cans...and a coffee can, too.
Another project to add to my kitchen update. Come on by and check it out anytime!
Once again, I'm so glad to be hanging out at the Cafe, today. 

 Thank you for having me by ~ Amy!!

Wednesday, November 20, 2013

How to Make a Fleece Scarf in 5 minutes for $2.00 - A Few Miner Adjustments

How to Make a Fleece Scarf in 5 minutes for $2.00

End the War…Just Make the Scarf

There’s this scarf...
just an ordinary green fringed fleece scarf from Old Navy.
I may have paid all of $2.00 for it about 10 years ago. There are also these 2 boys...
cute, smart, competitive boys. 
And when that scarf comes out for the winter they argue over that scarf.  It is always their turn to wear it, never the other person’s. And so the fighting ensues.
This year though, I decided to make a few Miner adjustments. I couldn't stand to listen to one more second of the green scarf war. And I couldn't bear to see the wrestling match that was brewing.
So I told those cute, smart, competitive boys to get in the car.
We headed to my favorite Joann’s Fabrics where they picked out their very own warm and fuzzy fleece. And boy oh boy were they excited! This in turn made me feel like mom of the year!
Materials Needed:
  • ¼ yard fabric that is 54 inch long (the width of the fabric on the bolt)….it cost all of $2.00 each
  • Scissors
  • Tape measure
  • Masking Tape
Steps:
Tip before starting: Fold the fabric in half and made sure all of the edges were straight by trimming it.
{1} Measure 5 inches up from the edge of the fleece.
{2} Put tape across the fabric at the 5 inch mark.
{3} Have your cute, smart, competitive child cut pieces of fringe up to the tape.
{4} Repeat steps 1-3 on the other end of the fleece.
{5} Remove tape and enjoy your scarf.
Baby, it’s cold outside. Why not make yourself a warm, fuzzy fleece scarf of your very own? 

Thursday, October 17, 2013

Mercury Glass Craft Project - Grace Grits and Gardening

grace grits and gardening
Have you tried Krylon's Looking-Glass spray paint? It's an easy way to make faux-mercury glass decorations for the holidays using inexpensive pressed glass. 

Although I had lofty ideas of painting plastic pumpkins, for successful results the paint should only be used on clear glass objects like bowls, vases, picture frames and candlesticks. When sprayed on the reverse side of an object, the paint dries to a dull finish then reflects a mirrored-like shine on the opposite side. (This product is for decorative use only and should not come into contact with food.)

Pictures of my before objects...nondescript pressed glass, rarely if ever used...
before - pressed glass bowl
before - basic candle coaster
Spray five light coats, allowing the paint to set one minute between coats. The picture below is after the first thin coat.
first coat
The next picture was taken after five coats. 
after fifth coat
According to the instructions, let set one hour before handling. I recommend even longer as the paint rubbed off a bit on my fingertips after an hour. (The Dallas heat and humidity may have added to the smudging...)

This was a fun and easy project and a great way to dress-up unused glassware or mismatched flea market pieces.

talya

Grace Grits and Gardening
Farm. Food. Garden. Life.


Friday, September 27, 2013

Drop Cloth Dish Towels - Stone Cottage Adventures

Hello to everyone at Inspiration CafĂ©!  I love being a monthly contributor!  My name is Marci and I blog at Stone Cottage Adventures.  I'm bringing you an easy sewing idea today!


Green 
Text Button


Giving credit where credit is due, here's where I got the idea!  Megin at VMG206 made gorgeous dish towels using fabric from a drop cloth!  A drop cloth!  They are ridiculously inexpensive for the amount of heavy weight fabric you are getting!
What an inspiration!  I love LOVE the raw texture as well as how durable and absorbent this fabric is.  I pretty much followed Megin's Instructions, just changed up the pattern to suit me. 

'Wanna see?  ;-)

 photo 025a42f6-285c-4d74-a7af-05b61d51ba20_zps4d5cc24f.jpg

The drop cloth I purchased had this stamp in one corner.  It totally made me smile!  So I cut the size I wanted and hemmed around the stamp!  One dish cloth complete!

 photo fee18e26-87f0-4214-9c78-461b4838c059_zps1d7224fb.jpg

Then I started goofing around with my paint pens, some stencils and a ruler.  Here are my achievements!


These were so much fun! ( I actually like the striped one the best.)  Wouldn't they make a fun hostess gift!  Just think of all the ways you could customize them!

I have actually completed THREE other projects with drop cloths now and will be sharing them at my lil piece of the internet, Stone Cottage Adventures!  Come on over!

;-)  -Marci

Monday, September 2, 2013

KIDDING AROUND SERIES - GHOST LEAVES

I have never done a kid craft on my blog.  I'll admit that it's possible some of my projects may have turned out to look like a kid craft, but it was not intentional.  So when the girls at the Inspiration Cafe wanted to do kid-themed crafts.....I totally freaked out.  Totally.  I mean, I've already told you that my 5 year old grandson has the attention span of a gnat, so crafting with him is almost impossible.  But, sometimes things just work out.  Last Sunday, my brother-in-law called and said my awesome nephew, Dain was wanting to come over to see me.  Always exciting! Seriously...this kid will pick up a huge snake.....


He will also make creepy faces in my corn maze for a photo shoot...
You will never be bored around a kid like this!
The wheels started turning in my head.  His attention span is bigger than a gnats...maybe like mosquito-sized.  I decided to ambush him into making a craft with me.
 To get a 9 year old boy to do a craft with you...you had better at least call it something cool...like Ghost Leaves. 
Gather up a few supplies...
You'll need 1 cute kid, some white craft paint, fake leaves,googly-eyes, magnets, a hot glue gun and some glue dots.
You'll want to paint one side those cheesy faux leaves with some white craft paint.
 I love the look on Dain's face when we first start out, but...he quickly warmed up to the whole leaf painting thing.
Paint as many leaves as the mosquito-sized attention span allows.  They dry really fast and are still very flexible. 
Flip them over and put a magnet on the back with a little hot glue.  Hold that magnet down for like 30 seconds and talk about googly-eyes.  Kids love them.  Just knowing they come next makes Dain smile.
Little glue dots are perfect for sticking on googly-eyes.  They're too small for a hot glue gun and you don't want to burn precious fingers that might be needed for picking up a snake.
You can tell that the attention span and picture taking tolerance are running low now, which is a good thing, because this project is over.  We have Ghost Leaves that will stick on your fridge...or your school locker.  Cool....
 .....and fun!
Don't have any googly-eyes??  No problem...a marker works just as well!  How do I know this?  Because after my nephew left I decided to play around and make one myself.  I opted for a Vampire Leaf....
 

Now go play! Please be sure to come back and join us for our Kidding Around link party coming up  Monday, September 16th.