Thursday, February 28, 2013

Knitted Bracelet by Mammy Made

 Adele is here from Mammy Made, today...


Hi everyone. I'm Adele and I live in England with my two gorgeous babies, Leyla who is 4 and Naomie who is 2. I am so excited to be contributing to Inspiration Cafe again today!


I usually blog over at Mammy Made. I like to write about crafting, cooking and homeschooling, although I am only homeschooling part time at the minute. I have tons of tutorials on there so come by and say hi, I’d love to see you! 


Today I am going to be sharing a lovely knitted bracelet tutorial. 

I made this cute bracelet for my future sister in law for her birthday just recently. I hope you all like it :)


To make your own you will need:
  • a bracelet (I got this one in a charity shop for 25p)
  • some wool
  • 3.25mm knitting needles
  • wool needle
  • scissors

Start off by casting on enough stitches to wrap around your bracelet. For me, this was 18 stitches. You want it to fit but be ever so slightly stretched around the bracelet. If it is too baggy the cover will slide around the bracelet and show off your join. If you are unsure on how to cast on, there are tons of videos online. I used the long tail method as I find it quick and easy and it looks good. You then need to work stocking stitch (knit one row, purl one row) until your piece of knitting is the length of your bracelet. Keep checking the fit until it seems long enough with a tiny bit of stretch. For my bracelet this took me 75 rows. Bind off, leaving a very long tail to stitch the cover onto the bracelet with.


Line up the two short edges, right sides together, and stitch them together to make a tube. Wrap the tube around the bracelet, with the right side on top, and start stitching the two long edges together, as neatly as possible. Weave in the ends very well, or tie off in a knot, when you reach the end. Turn the join in to the inside of the bracelet and you are done :)


I hope you all enjoyed this tutorial. Thank you so much to everyone behind Inspiration Cafe for letting me contribute again. It's been fun!


Wednesday, February 27, 2013

A Good Marriage With Mistakes - One Day At A Time

Hey everyone, today Tasha from One Day at a Time is visiting the Cafe, so grab a coffee and join us in saying welcome...


I just so happened to make this around Valentine's Day, but this was not an actual gift.  Well maybe it was....to both of us.  I saw something similar to this for sell online and knew I could come up with my own version.  I always have "stuff" around to create things. 

I love this quote from Martin Luther!  Exactly how I think a marriage should be.  Always showing love and value for each other.  And the anticipation of wanting to spend time together.  Yes, I am still madly in love with my husband! 

And my nightstand was lacking some wall art above it.  This was perfect.

After Brant cut the wood I filed down the edges and painted it a country blue.  I had the scrapbook paper in my stash and simply printed out the quote. Then I used my trusty Homemade Mod Podge to apply the papers.  You'll notice the paper has an antiqued look. That is from the Distress Stain.  I have no idea what this stuff is really far, but I found it one day at Hobby Lobby and knew it would come in handy for my love of all things old and worn looking. 

I squeezed a little of the stain in a small bowl and added just a little Mod Podge.  Stirred it up and created a colored Mod Podge.


I started out only going to "color" the white copy paper with the quote on it, but soon painted it all over.  Even the wood!


As I started to go back and add the colored Mod Podge all over I saw this.  That spot was trouble!


Well GREAT!  Now what?  I knew I had to add some sort of embellishment to cover this up.  Quickly I started rummaging through all my craft boxes and remembered all my buttons.


Perfect idea!!!!


And here it is with the buttons glued and everything dry.


I love the way it turned out.  And now our bedroom has a pretty piece of wall art with a wonderful quote to live by.  I thank God for my husband and want to be a blessing to him as much as he is to me.


OK now I have a question for you all to see how observant you are.  Because let me tell you I literally did not catch this until I was typing up this post. 

Did anyone notice I spelled Luther WRONG?!?!

Yep, he is Martin Luther, NOT Martin Lutcher!!!  I have looked at this for days as I was working on it! And my husband who usually catches ANY error I make did not catch it either. 

Now folks that is very typical for me.  Spell check is my BFF!!!  But this time that did not work because "Lutcher" is an actual word/name.  But not the right one for this man. 

So what do I do from here?  All the work I have done will remain on my wall.....at least for now.
 It's the quote I love, not the man who said it. 

**And to the curious minds wondering why I even posted this since I messed up a project, well I like to keep things REAL!**

Tuesday, February 26, 2013

Furniture Makeover Series #3 - Simply Vintageous....by Suzan

Good Morning Everyone - This is my last installment for furniture makeovers for the Inspiration Cafe - too bad - I was getting used to it LOL This makeover all started with a Craig's List find - and this was how it was advertised! Nothing like putting a little effort into your staging, is there?
John could not understand what I saw in this - but I saw Vintage French Provincial - I saw curved designs on the back of a chair - I saw a scallop edge on the table bottom - What I did NOT see was all the junk in the photo - I'm able to filter all of that out at this point - where that was ALL John could see - but isn't that an interesting array of items lol There's a phone - a colander - stacked cups - a goose necked lamp - a porcelain frying pan - a cutting board - a water bottle etc - I should save this, it could work well as a shower game - you have 30 seconds to look at it and list the items !!! John went to pick up the set - and I called him on his way back and asked him what it looked like Suzan says - Hi - did you get it? John says - Yup Suzan says - You don't sound very enthusiastic John says - Wait till you see it - I told you to come with me - Suzan says - I don't need to see all of it - I saw the photo - that was enough for....... John interrupts - IT'S GARBAGE - YOU SENT ME OUT TO PICK UP GARBAGE AGAIN Suzan says - I'll transform it John - you know that by now - John says - LISTEN, the minute I get in the house I'm taking a shower, do you understand me - you don't know where I've just been Suzan says - You're becoming a germaphobic I think John says - good-bye Suzan, I'm hanging up now - OK - what I also didn't see was this  ( and nor would I have thought it possible really ) and you will want to take a shower after looking at it lol

I didn't see the color of the filth on the wood either as a matter of fact but each chair took 3 buckets of soapy water before the water stayed clear - you can see that here if  you like photos of dirty water
So first order of the day was to remove that fabric and in some cases there were multiple layers of fabric - for the most part it practically disintegrated as I pulled - except where I needed it to - pliers were a neccesity here
then I cut out my new seat cushions - these had none at all - they were like sitting on wood chairs
Now here's an incredible tip supplied by JOHN himself - he's puffing like a penguin right now - You know when you're reupholstering seats sometimes it's hard to judge where the screw hole is, right? and if you try to screw in through the fabric - well, sometimes it works and sometimes it's a disaster, the fabric loops around the screws and fuggedaboudit - SO...................... I was explaining this to John - and he said - Well the solution is staring you right in the eyes - just keep the screws in while your stapling the fabric LIGHTBULB ANYONE????????????????
I removed them before I took this shot - ( STOOPID  ) but trust me when I tell you this is a powerful TIP. It's going to be such a breeze screwing the seats back in - ( unless all of you already do this - it honestly never dawned on me lol ) Oh and that piece of paper?  WHATEVER YOU DO DON'T REMOVE IT - there are chair police that go around imposing terrible fines for those of you that dare to do so
it used to be 50 to 500 dollars back in the day - I believe it's now at 75,000 dollars - and be careful who you try to sell your item to - if the potential buyer suddenly flips the chair over very quickly - chances are they're Chair Cops......................... and so finally I had one chair done
hmmm - lets rip that all off says the other Suzan ( don't know her? you can meet her here ) it doesn't go with the way I want to do the table now that I think of it perhaps this will look better
hmmm boring - 3rd time lucky?
Perfect for this set......................... Ok now I have an even more important tip for you - and this one's all mine Once you've painted the chairs - and cut the foam - and cut the fabric - and stapled it on - ( leaving the screws in place ) it's imperative that you stop and get yourself this
not 1 - not 2 - but 3 miniature cheese cakes smothered in chocolate - and a glass of milk ( just because it does the body good ) ...................................... John says - taking a picture of your dessert are you Suzan? Suzan says - yup - that I am John says - I suppose that fits in with the chair makeover post somehow? Suzan says - you got it mister - it's a tip actually John says - on what? how to gain weight while reupholstering? Suzan says - be careful John - be very very careful - your treading on dangerous ground now Ok - once you've finished you snack - and cut your eyes at your better half - it's time to get started on the table............................ I'm scared to show it to you - because this is really a love it or hate makeover SO PLEASE PLEASE BE KIND - BECAUSE JOHN SAID A VERY MEAN THING ABOUT MY DESSERT AND I'M FEELING KIND OF FRAGILE.........................and just because I'm nice I won't tell you what he can consume at one sitting - but it's quite astonishing really Oh wait - I'll show you the before again first - that way it can't help but look amazing! ( another tip for you diy bloggers )


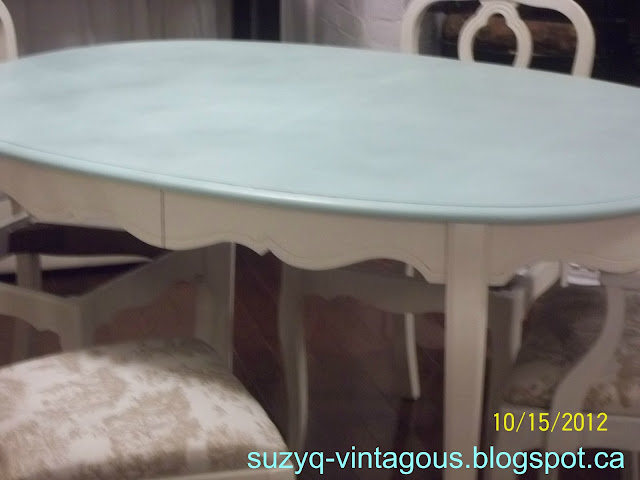
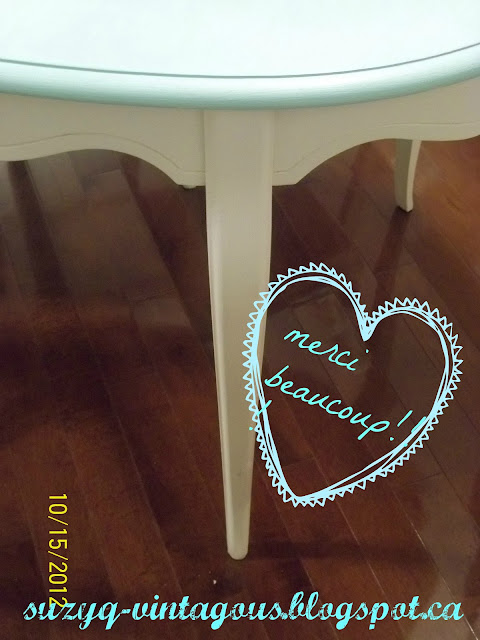
and here's the curves I saw from the very beginning

the next photo is blurry because I couldn't get her to stop dancing - she was doing the can-can or some crazy french dance - I mean she was MOVING guys!
She has a " leaf " that I'm not finished yet - so can sit 6 to 8

The paint color is a creation of mine - Van Gogh paints allows each stocklister to create 4 designer colors, this is going to be one of mine - so can't divulge the secret recipe ladies lol
and I don't know if my camera does it justice because it's really beautiful
( if I do say so myself )

shhhh - did you hear something -
just now
a faint little voice?
isn't that sweet - look what she just whispered


(  Bienvenue ma cherie - Bienenue  )
Have a wonderful day !!!
Suzan
XOX 
and maybe just have 2 of those cakes - 3 will make you feel sick
And that's all she wrote everyone.................. Thanks so much to the ladies of this great blog for having me!!! A beintot! Hugs,

Sunday, February 24, 2013

DIY Framed Monograms with Mary of Sweet Little Bluebird

Hi again everyone,

It's Mary from Sweet Little Bluebird!

I have a few more Framed DIYs to share today!

If I'm sharing a craft, there are three things to know:
They are quick, easy and inexpensive!
Today's Cafe share meets all three!

DIY FRAMED MONOGRAMS


For the one above, I used a square 5x5 frame.  
This was the only one left in the store.  It had a little dent 
on the bottom, but I decided to buy it anyway.
(Frame was 50% off) 
The matte is scrapbook paper.


I made this framed S monogram for a friend's birthday!


This framed A monogram was made by one of my daughter's friends. 
This was a birthday gift for one of their friends (teen),
The friend LOVED it!

Frame, paper and letter are from Hobby Lobby.


The framed N above was made with burlap matting 
and a letter N tile I found at Hobby Lobby.


EASY INSTRUCTIONS FOR DIY FRAMED MONOGRAM:

-First, remove the glass from the frame. 
-Secure the matte with tape or hot glue.
-Next, hot glue your letter to the matte.

*Use a good amount of glue if you're using 
the same letters, they are heavy! 


That's it, you're done ~ how sweet and simple is that!!!

There are so many options to create your 
own piece that fits your style and taste.
You could use fun fabric for matting, burlap, 
letter ornaments, wood and silver letters...have fun!

These make great gifts!


Thanks so much for stopping by the Cafe!  

Cheers!

Saturday, February 23, 2013

Saturday Weekly Wrap Up No 6

Happy Saturday~!!!!

Its that time of the week again...check out what we've been up to on our blogs


Natalie...NorthShore Days

Champion Cheese Muffins


  Tried & True Tuesday ~ Crock-Pot Creamy Salsa Chicken


Heather ...The Beating Hearth

How to make a beginners Table Runner...Part 1
Let's start measuring...Beginner's Table Runner


Danni ...Silo Hill Farm


Ruffle lace scarf
 Bottle cap Watch
Wet Your Pants Wednesday #16
This Is Me - My Reflection


And, it was Nat's turn at the Cafe this week, she her latest DIY project, an
Upcycled Dresser to TV Cabinet


We hope you have been inspired this week. 

Take care and have a great weekend, don't forget to follow us on Facebook,
 

xxx
 Nat, Mary, Heather, Danni and Mel
 

Inspiration Cafe is looking for guest posters and contributors. If you would like to guest please let us know, we would love to have you. If you would prefer a feature instead, feel free to drop us a line. New or old posts welcome.