Recently, after posting some pictures of my master bedroom, I got many emails asking about my duvet cover.
Where did you get that duvet?
Did you make that duvet on your bed?
Who made your bedspread?
If you can believe it....I am the maker of this duvet cover.
Yep. This little semi-city gal turned mountain dweller can sew a mean straight line.
My mom (she rocks) also helped me with this project about 3 summers ago.
Finding the perfect comforter design in stores or on-line was an impossible task.
After scouring the special order fabric at the local fabric store everyday for two weeks, I finally found the perfect pattern and ordered it.
Now here is the kicker….I get bored easily.
I know what you are all thinking...
"You, Trina? Bored? Constantly changing your mind? I never would have guessed it!"
But it's true. So while I waited for my lovely fabric to come in I started to worry that I wouldn't like it anymore.
2 weeks went by.
Then 3 weeks went by.
Finally the call came that my fabric had arrived.
(Secretly...I almost totally forgot I ordered it, it took so long. I blame Mommy Brain.)
Luckily, no Miner adjustments were needed for this project. I still loved it.
I really should seek some professional help for my indecisiveness.
Any-who...
Supplies Needed:
1 flat king sized sheet (72" wide x 84" long)
Fabric (5 yards)...that measures 54" x 180"
Sewing Machine
Pins
Ruler
The fabric is only 54 inches wide, so we had to place two pieces on top of the sheet side by side to make it the correct width.
Line up your pattern and pin the two pieces together up the middle.
(You have not pinned it to the sheet yet).
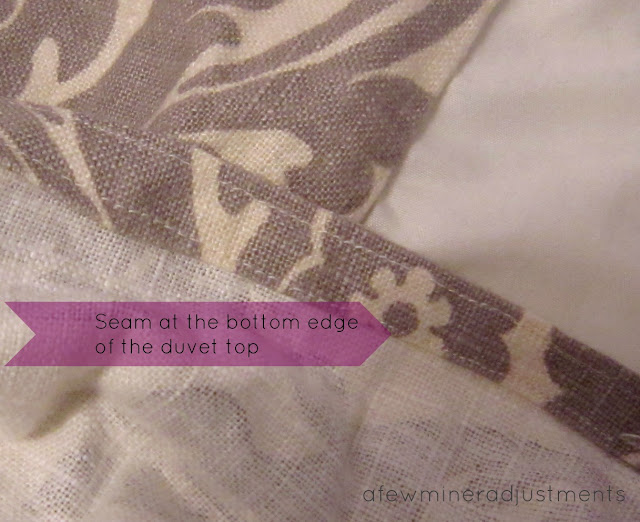
After you sew it up the middle, make a hem along to bottom edge of the fabric
(this will stay open to put in a comforter).
Next, pin the rights sides of the sheet and fabric together.
Sew around the 3 sides leaving the bottom open to put in your comforter.
Cut the top 2 corners at a diagonal above the seam line
(this makes the corners more crisp and pointy when it is turned right side out).
Turn it inside out and put in your comforter.
Homemade Duvet in about 3 hours
3 years later, I am still in love this fabric.


Trina, what a great duvet cover! Awesome tutorial too. I'm loving the little pillow too - so cute
ReplyDeleteThank you, Natalie!
DeleteThank you, Natalie! It was a lot of fun to make!
DeleteTrina, that is gorgeous! I love it! You did an awesome job and I admire your mad sewing skills!
ReplyDeleteThank you, Danni! My mad sewing skills only apply to straight lines and the ocassional zig zag. Although I have been known to put a zipper in a pillow case before. That is just how I get jiggy with it.
DeleteI love this! It looks so cozy and I love the pillow!!! Great fabric too!
ReplyDeleteThank you, Heather! The pillow is my favorite!
DeleteThis is beautiful!!
ReplyDeleteThank you, Amy!
DeleteI love this I so want to make my own for my daughters room thanks for sharing )
ReplyDeleteThanks, Mel! It will be so much fun for her to pick out the material. A one of a kind.
DeleteHi Trina, I was just thinking about how I wanted to make one of these, your instructions are great, I'm pinning for future reference, and I love that fabric!! ~ Amy
ReplyDeleteThanks, Amy! Glad these are helpful. If you can sew a straight line (like me) then yours will be great!
DeleteWow.....beautiful fabric and duvet! All that was done in about 3 hours?! I love the throw pillow - yay to extra fabric! Great tutorial! Awesome AWESOME share, Trina! Thank you so much! What a treat!
ReplyDeleteThanks for your kind words, Mary! My mom helped me with this, so does that really make it 6 hours? Ha! It was a big piece of fabric to put through the machine, so it took two sets of hands.
DeleteExtra fabric, rocks! Doesn't it?!?