


 Springfield Time
 Melbourne Time
 Auckland Time
Good Morning, I'm Estelle aka Twinkle Star and I blog over at
Twinkle's Tutorials and Craft Time. I am a busy stay at home wife and mum to four fab kids aged 6, 4, 2 and 3 months. Crafting keeps
me sane in my crazy, busy life :)
Thanks to Mel and the girls at the Inspiration Cafe for having me
over today. I will be showing you how to make a pretty Window Effect Picture Frame at a fraction of the cost...

You will need:
A Cheap Picture Frame
Wooden Sticks or Dowels
Sandpaper or Old Nail File
Glue and Glue Gun
Scissors or Craft Saw
Craft Spray Paint
Paper

I picked my frame up at the local pound shop (Dollar Store) and my
wooden sticks were a 60 pence packet of garden sticks. The most expensive part was the can of spray paint - I bought a mini can,
which was enough for this project. The glue and glue gun I already had.
Step 1:
Lay out your sticks in the design you would like your window
'panes' to be (I used 5 sticks)...

...cut off any excess...

Step 2:
Take the vertical sticks and cut each one into 3 pieces so that
they fit snugly against the horizontal sticks and frame...


Step 3:
Remove the back and the glass from your frame then heat up your
glue gun. Whilst you are waiting take each stick piece and sand off any rough bits (I used an old nail file as I didn't have any
sandpaper to hand)...


Step 4:
Take the horizontal sticks and place a dab of glue on each end,
adhere to your frame in your desired position. Do the same with each of the small pieces attaching them to the frame edge and the
horizontal sticks. Make sure they run in straight lines down...


Step 5:
Once the glue has dried take your frame outside and place on some
paper to protect your surface (I like to use greaseproof baking paper as it stops the item from sticking to it). Lightly spray your
frame twice, letting it dry between coats...


...Leave until completely dry.
Step 6:
Replace the glass, then add your chosen scene or photo and attach
the back...

...looks pretty if you attach wide satin ribbon through the hanger and tie in a bow then hang up.
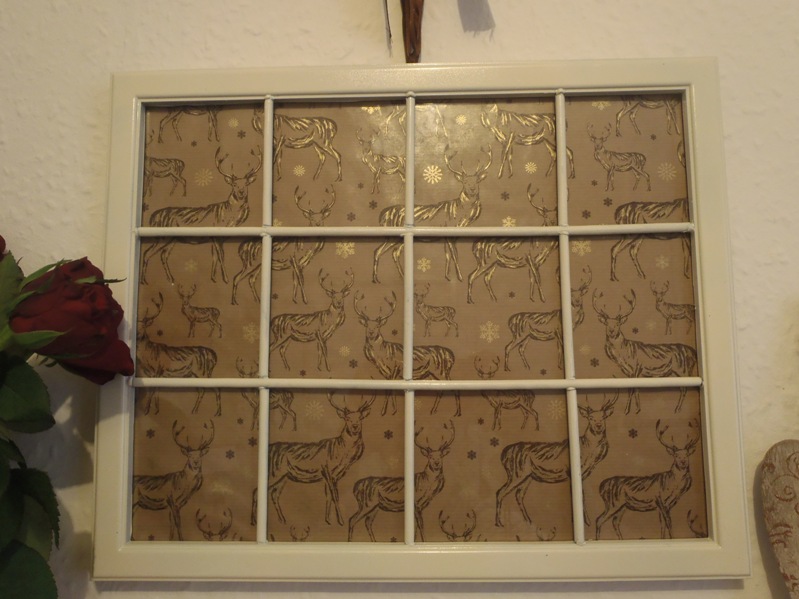
Voilà a budget friendly way to achieve a Window Effect Picture Frame! (Would also look pretty on a mirror!)
Hope you enjoyed that tutorial, there are plenty more over on my
blog - love for you to pop over and say hi!
Thanks ladies for having me, it was fun!
Estelle xx

Such a fantastic idea, I would love to do this with a Christmas scene. Thanks for sharing Estelle
ReplyDeleteThis is such a gorgeous idea. I really love it. Thanks for guest posting here!
ReplyDeleteThis is so very cool! I have been looking for a cheap window for a project forever. Never once thought about making my own! I love this and I pinned it! Thank you so much for sharing it with us here at The Cafe today!
ReplyDeleteHi Estelle, This is such a great tip & idea....so many things I could do with this! I'm like Danni, I never thought if making my own! Thanks for the great share at the Cafe!
ReplyDeleteReally cool idea. I am going to forward this to my wife and see if she wants to give it a try...we just have to find something creative to put under it!
ReplyDeleteThanks ladies! I had such a lovely visit today :)
ReplyDeleteHugs, Estelle xx
This looks wonderful and such a great idea! Now I'm thinking of all kinds of scenes to go in one of these. Thanks so much for sharing and have a great week! ~Cindy@littlemisscelebration.com
ReplyDeleteWhat a fabulous project Estelle, that really does look like an actual window! Thanks for sharing your tips x
ReplyDeleteWhat a wonderful idea Estelle. I am going to do this project!!! Thank you so much for being at the Cafe - please come back anytime, we would love to have you xx Nat
ReplyDeleteAwesome and has given me an idea on how to show a picture that I have painted which is an outside scene. Hugs Mrs A.
ReplyDelete