Showing posts with label Jewelry. Show all posts

Tuesday, December 31, 2013

New Year's Eve Earrings - Mother Crafter

Our last post of 2013 - thanks Vanina ;-)

2014 is here! You can welcome the New Year with these quick and very easy earrings that will add spark to your outfit. The best part: you can make them in, like, 20 minutes. Seriously! 

 
You will need:
  • A small fabric scrap (sequined or sparkly)
  • 2 feathers
  • 2 Earring hooks
  • 2 Jump rings or ring connectors
  • Scissors and a hot glue gun
 

(See my new pair of scissors? My friend Julieta gave me these along with a matching measure tape and a cutting knife. They are from the Victoria and Albert Museum in London. So cute!!!) Cut 8 strips out of your fabric (approx .25" by 2.25"). Open one of the jump ring or ring connector and insert 4 strips through it. If your fabric is thick and does not want to cooperate (certain fabrics have attitude ;)) you might want to use an embroidery needle to make a hole at the top of the strips. It should look like this: 
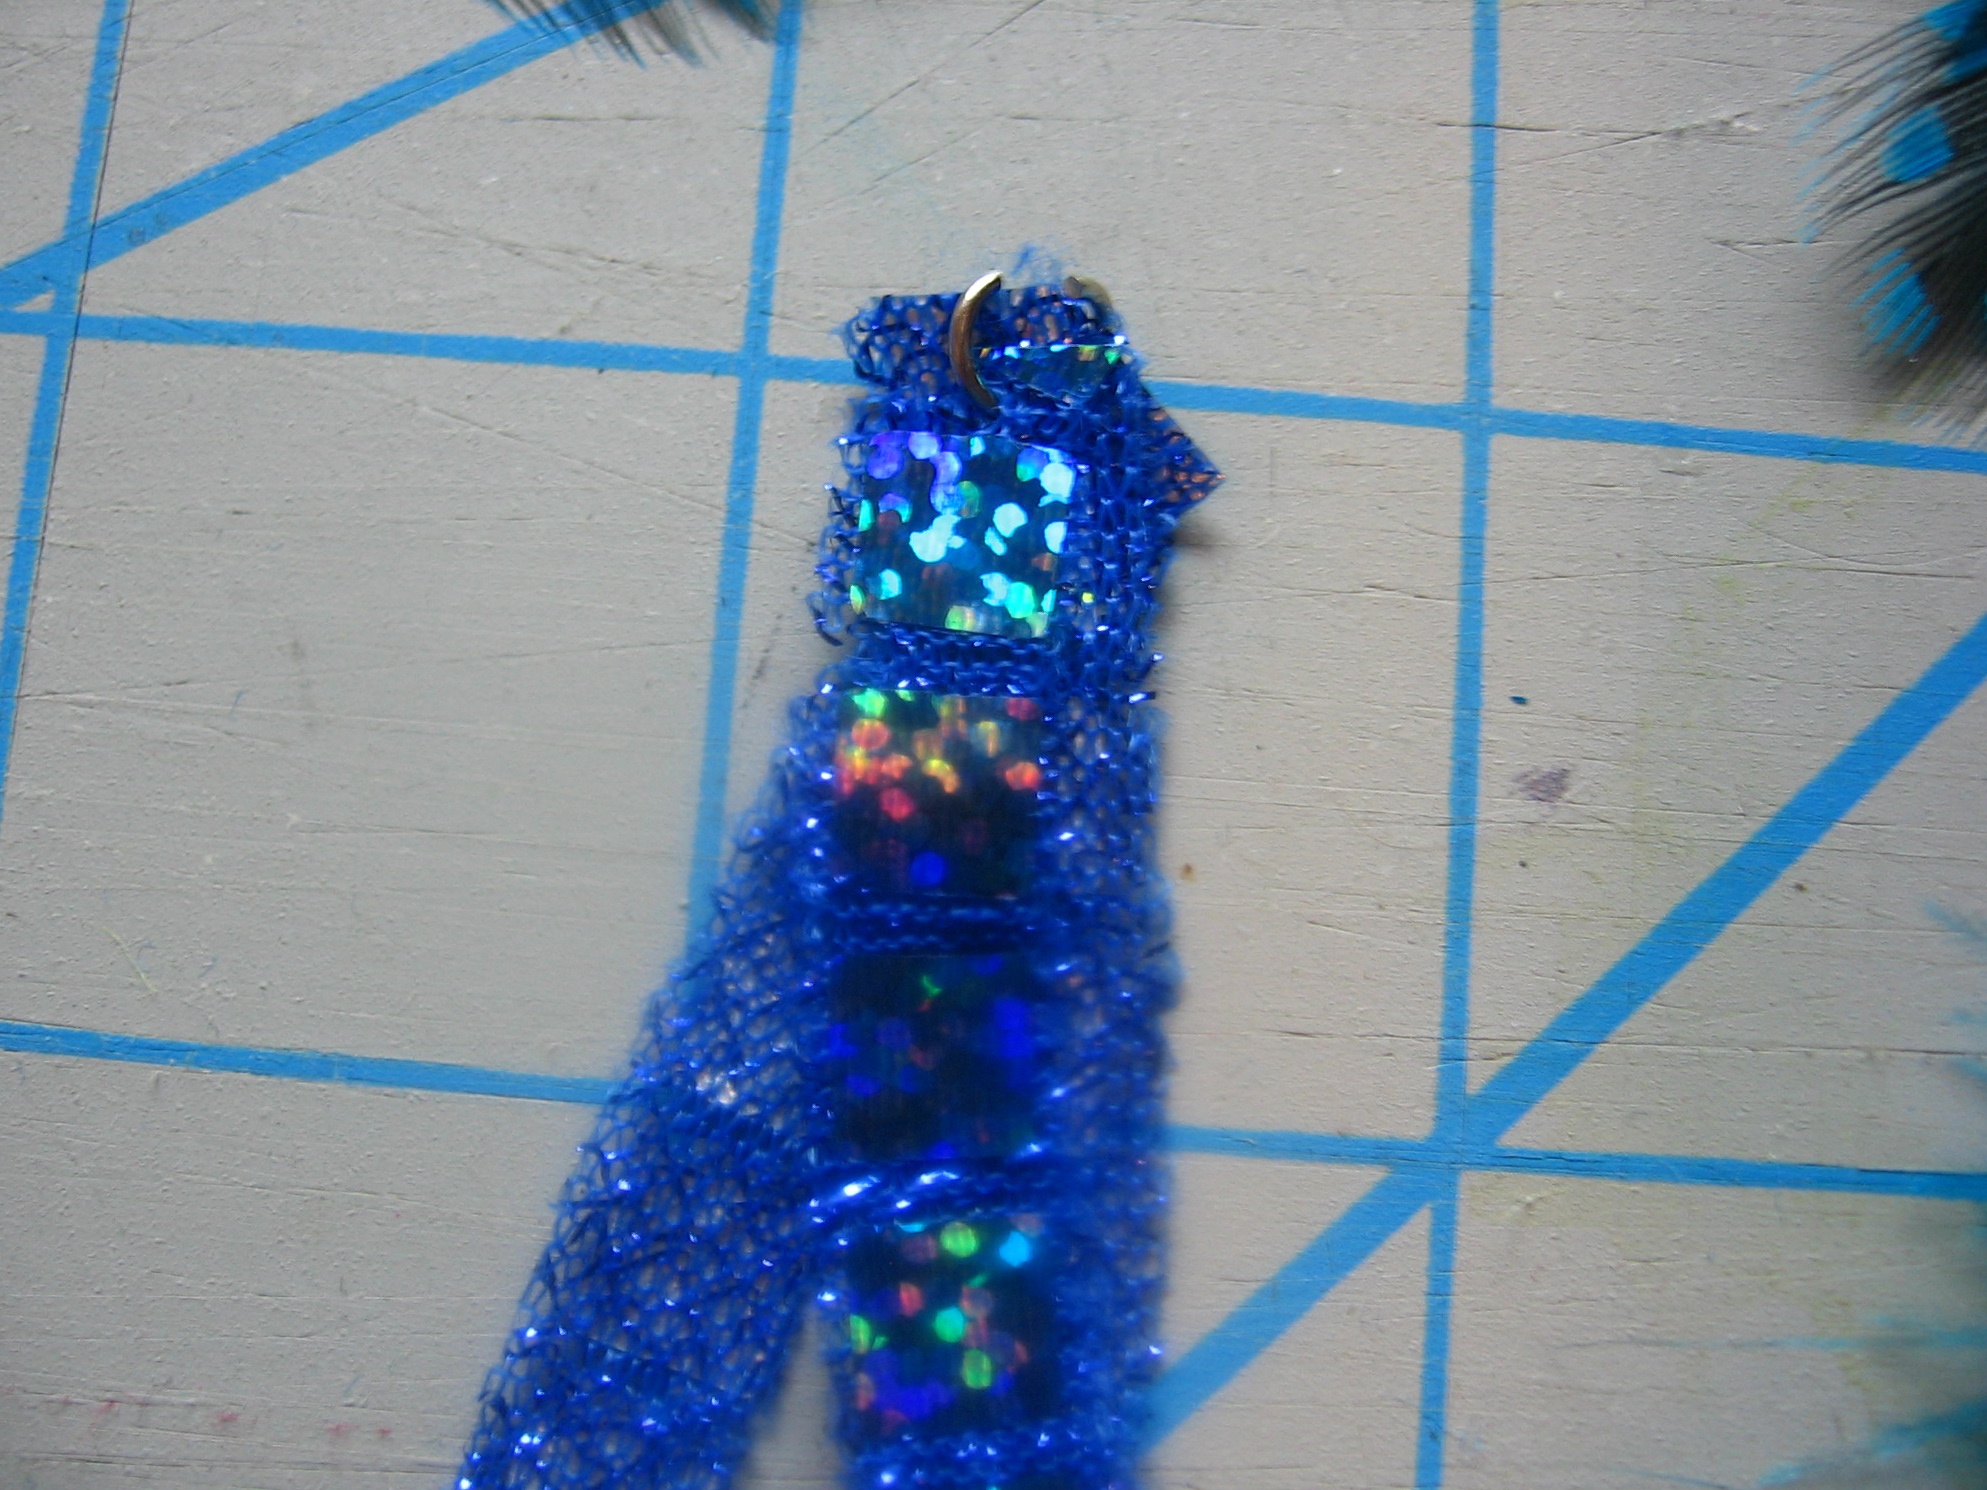

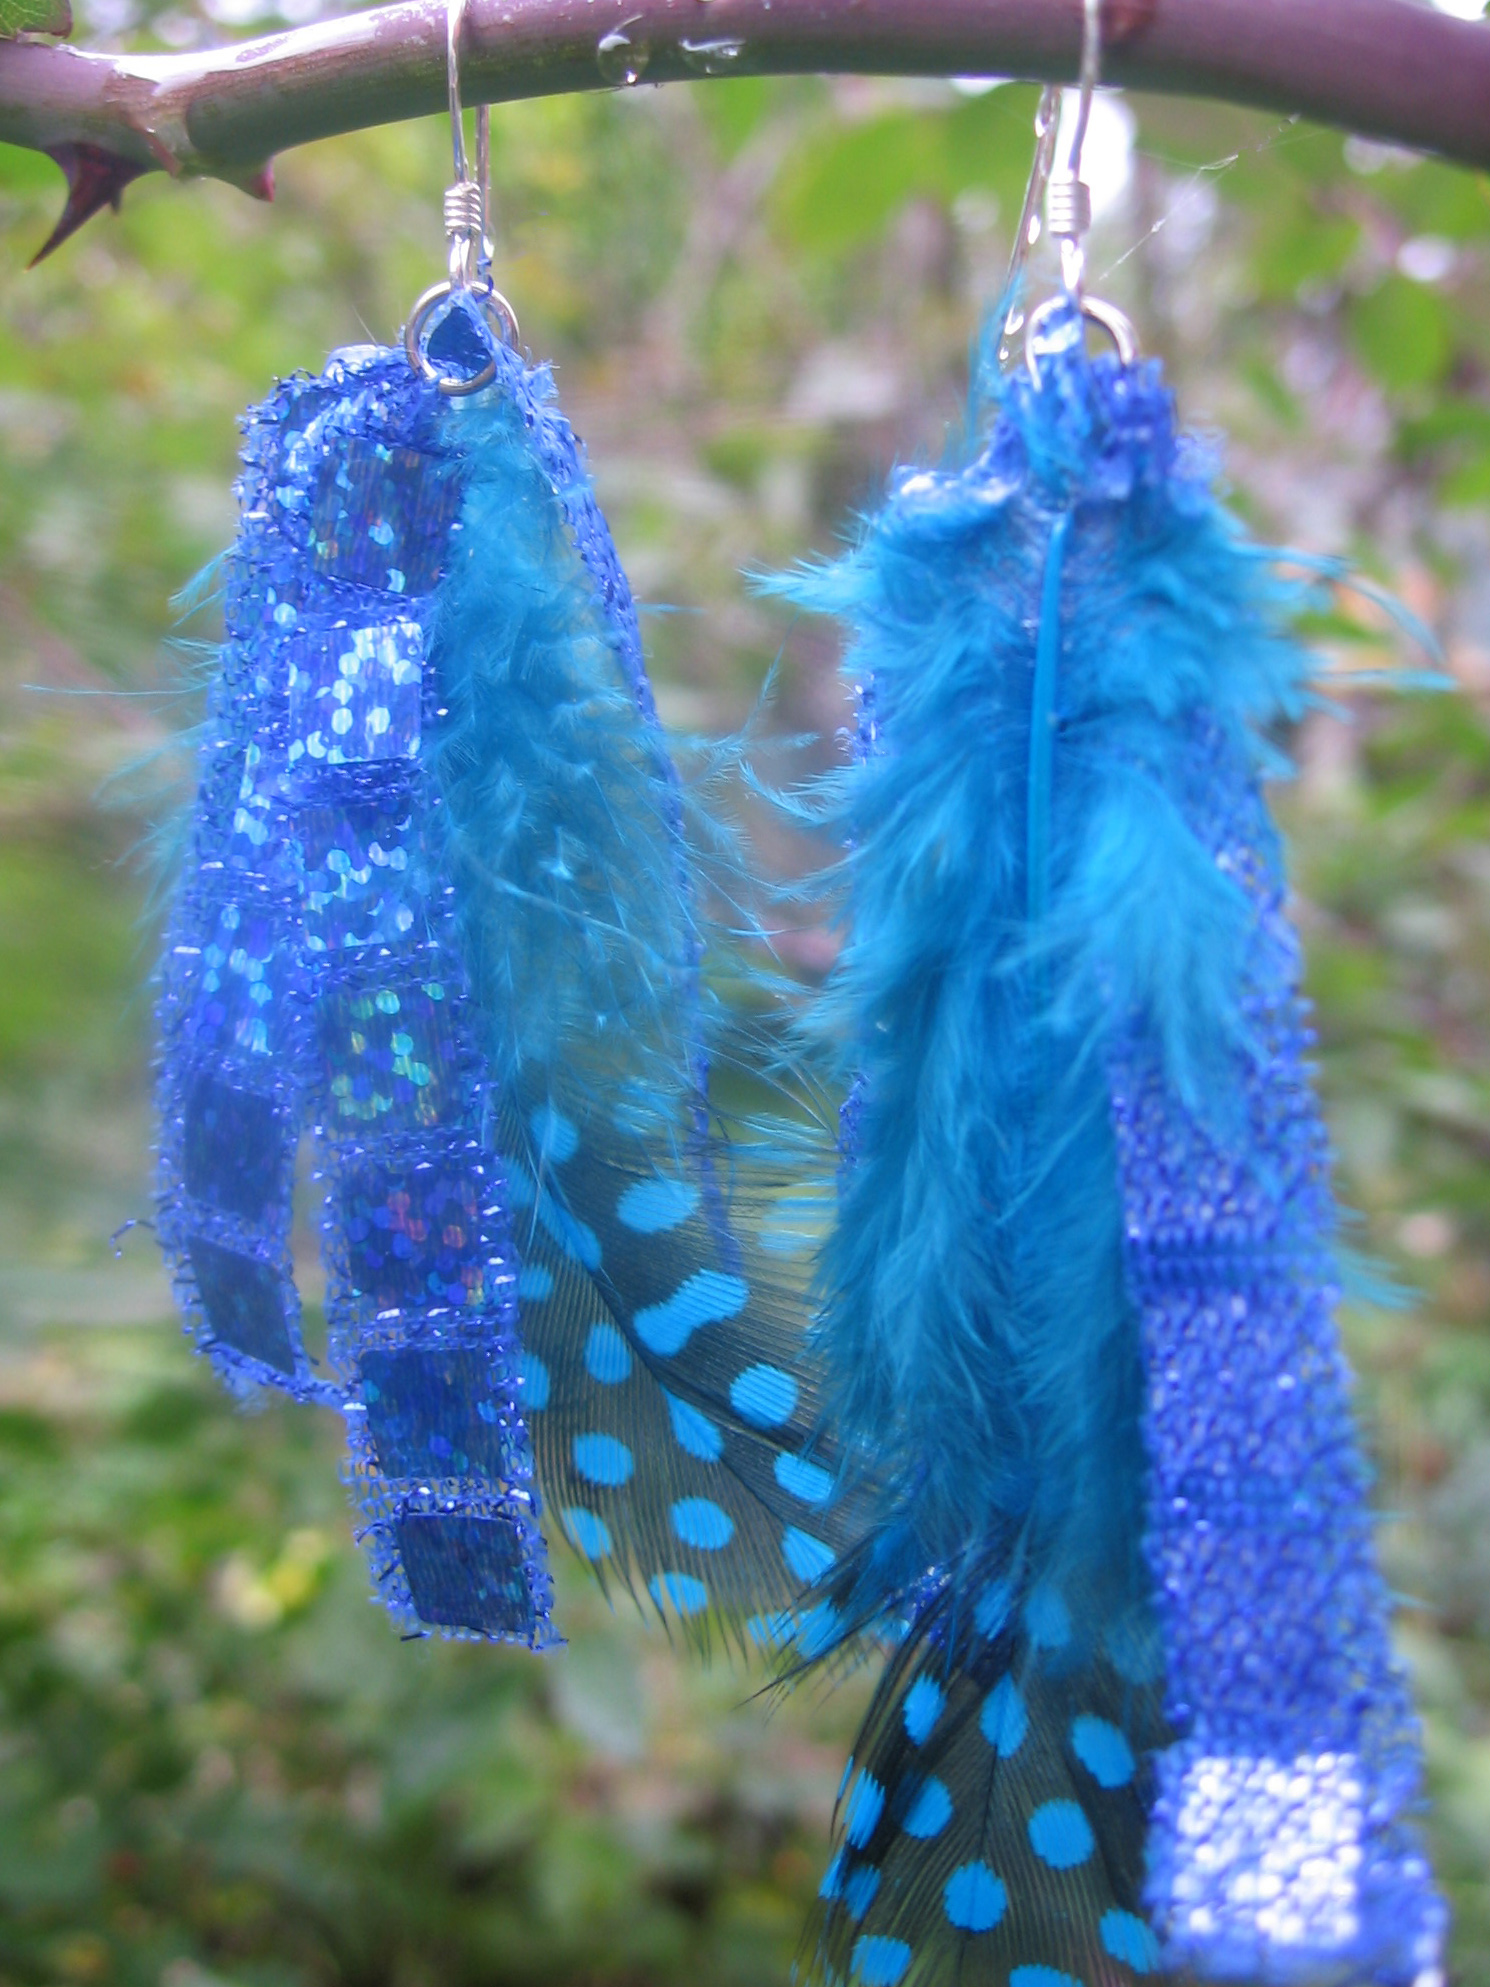
Close your ring. Now put a tiny dot of hot glue at the top tip of your feather and glue it to the wrong side of one of the strips. Put the hook on and... you are done!! See? I told you it was a fast and furious tutorial!


 Repeat all the steps to make the second earring. Or just use it solo. You can also play with the length of the strips to make it longer or shorter. 
 

Happy 2014! I look forward to continue creating and sharing with you a lot more awesomeness through the New Year. Here is to a year full of happiness, love, health, inspiration and craftiness! Thank you for reading my blog. Salud y chin chin! (that is Cheers! in Spanish). You can find me on Facebook, Twitter, Pinterest and Bloglovin! -- Craft on, Vanina mother crafter ~ handcrafted happiness

Sunday, June 23, 2013

Bloomin Marvelous Series - Summer Garden

Hey Everyone, 

Today, I am so excited to be kicking off our next series called Bloomin Marvelous and it's all about Gardens - anything to do with gardens! 

So I'm going to be sharing an easy Statement Necklace tutorial based on a strip of ceramic flower shaped beads that just reminded me of a Summer garden.

What you need for a necklace:

1 headpin, jump rings, chain, a clasp, beads and a focal bead.
Pliers (not pictured) 

What to do:

1. Thread focal bead and other beads onto the headpin
2.  Bend the headpin at a 90 degree angle.
3.  Using round nosed jewelry pliers, bend the headpin back around to form a half loop.
4. Measure the middle of your length of chain and hook the headpin through a link in the chain 
5. Twist the wire of the headpin around the loop.
6. Keep twisting around the loop, pulling the wire neatly in a circle. tuck and tighten the end.
7. Thread seed beads on to jump rings.
8. Work your way along the chain, on either side of the focal, adding the seed beads.
9. Complete the necklace by adding the clasp.


Easy right? So easy!

 It turned out much better than I pictured! Don't you think?


Because I was loving the colour combination so much I whipped up a simple bracelet to match.


I just loved this challenge! I had so much fun making these items.


And they just shout Summer Garden.


I hope you were inspired today and I hope you all enjoyed my tutorial.

Don't forget to stop by next week for our next post in the series.


Take care everyone
 
 xxx
 
Photobucket

Linking Up to These Great Parties

http://www.uncommondesignsonline.com/coastal-decor-monday-funday-link-party-23/
http://www.everythingetsy.com/2013/06/crafty-girl-linky-party-crafty-tote-bag-giveaway 
http://www.sewcando.com/2013/06/craftastic-link-party-time-sprightly.html 

5 Patriotic Crafts | Making the World Cuter Monday #180
 http://withablast.blogspot.co.nz/2013/06/all-my-bloggy-friends-link-party-52.html
 http://www.craftytexasgirls.com/2013/06/the-scoop-link-party-72-with-crafty.html#more
http://www.watchoutmartha.net/2013/06/martha-mondays-link-up-party-features_23.html
 http://www.homestoriesatoz.com/tutorials/tutorials-tips-link-party-115.html
 http://cupcakesandcrinoline.com/2013/06/project-inspired-linky-party-19/
http://www.blackberryvine.blogspot.co.nz/2013/06/tuesday-to-do-118-and-117-list-makers.html 
http://www.craftyconfessions.com/2013/06/tuesday-confessional-link-party_24.html
http://www.notjustahousewife.net/2013/06/show-me-what-ya-got-125.html
 http://www.mygirlishwhims.com/2013/06/your-whims-wednesday-117-and-features.html
http://www.gingersnapcrafts.com/2013/06/wow-me-wednesday-109.html
http://www.smartschoolhouse.com/2013/06/link-party-whimsy-wednesday-june-25th.html
http://www.savvysouthernstyle.net/2013/06/wow-us-wednesdays-124.html
http://www.the36thavenue.com/2013/06/best-diy-projects-17.html
http://www.52mantels.com/2013/06/thursdays-are-your-days-terrariums.html
http://www.theshabbycreekcottage.com/2013/06/transformation-thursday-no-210.html
http://www.houseofhepworths.com/2013/06/26/hookin-up-with-hoh-154/
http://www.stonegableblog.com/2013/06/tutorials-tips-and-tidbits-54.html
http://igottacreate.blogspot.co.nz/2013/06/wildly-original-link-party-58.html
http://happyhourprojects.com/happy-hour-friday-06-28/
http://www.oneartsymama.com/2013/06/shine-on-fridays.html

Friday, February 1, 2013

Tough Love Leather Earrings


Hola! My name is Vanina and I am from Argentina. I am a stay-at-home mother of a beautiful girl, Paloma. I live in a funky home in Oakland, CA, with my husband Michael, my dog Juancho and Bob The Super Cat.

I make stuff with my hands that make me and other people happy, reusing and salvaging things as much as I can to make good for the planet. I believe that you can boost your happiness through creativity!
I created Mother Crafter to share fun tutorials, stimulus, and information(in English and Spanish) about living a design-conscious life on a low budget. And to keep me sane while staying at home. Ha!
I hope you will find creative ways to enhance your lifestyle in this blog and feel inspired by it.


Fourteen days to Valentine's Day. Whaaaaat?! I started my annual DIY Valentine series with these leather heart earrings I made with scraps of leather and Gilder's Paste my craft fairy sent me (that would be my aunt Melissa). I confess I haven't heard of Gilders Paste before she introduced it to me, but I found it very interesting! I definitely want to experiment more with it in the future. These earrings are pretty easy to make and they will be the perfect companion to a leather jacket, or a rocker outfit . You will need:
  • A leather scrap.
  • Gilders Paste.
  • A punch or leather needle.
  • Chain, jump rings and earring hooks.
  • Jewelry tools
Mother Crafter Tough Love 

 Cut four hearts out of the leather. Apply Gilders Paste to them. Do not use a lot, just a tab in your finger will go a long way. If you want a distressed look you can rub the paste with different intensity in different places. Let it dry. Note that the instructions says you can polish it for a shinier look, but I didn't.

MC Leather Earrings 

Make a hole with the punch or the needle. I made holes in the center for two of the hearts and for the other two I did it in the right corner side. Now cut your chain to the length you want (mine are 3 inches and 1 ½ inches, two of each). Connect the hearts to the end of the chains with jump rings. Lastly, connect them to the hooks.

Mother CrafterLeather EarringsMother Crafter LeatherEarrings 


 You are done! I think they came up pretty cool! They have a tough chick look.
  
MotherCrafter Leather Earrings 

Thank you for letting me share with you today. I hope you’ll swing by to check out my blog! You can also find me on Facebook and Pinterest!

Sunday, January 13, 2013

Simple Wire Wrapped Pendant


 Hey Everyone,

Another necklace I hear you ask? I know, I know, I'm more of a bracelet person myself, but for some reason I'm rocking the necklaces lately.
And this one is just so easy, its a great beginner's project and can be whipped up super quick as an accessory to match your new outfit or
as a last minute gift for a special occasion.
 

 What you need for 1 pendant:

A bead (tear drop is preferable but not necessary), 1 headpin, a length of 20 gauge jewelry wire, a jump ring, pliers and a chain

How to:

1. Thread the bead onto the headpin.
2. Bend the headpin at a 90 degree angle
3. Using round nosed jewelry pliers bend the headpin back around to form a loop. (note - you don't need round nose pliers, if all you have are the standard pliers - those work just fine too)
4. Cut off excess wire

5. Attach the jewelry wire onto the loop and secure (ignore the jump ring in this pic)

6 - 8. Wrap... it does not need to be neat - in fact its supposed to be random and fun. Tuck in the end of the wire and add the jump ring

9. Cute pendant! Now add the chain!


 I loved this one so much I made a whole bunch of them!!!

I attached 3 to a larger jump ring to make a small cluster pendant of sorts.


These little pendants are simple and striking enough to be worn on their own. 

I love this turquoise one - love it!!!

Once you start making these, you wont be able to stop. 
Be warned - they are addictive!  

If you have more beads of the same colour, this technique would look stunning if you were to make earrings!


I really hope I've inspired you all today.... 

Take care and have a great week, don't forget to follow us on Facebook,


 xxx
 
Photobucket
Inspiration Cafe is looking for guest posters. If you would like to guest please let us know, we would love to have you. If you would prefer a feature instead, feel free to drop us a line. New or old posts welcome.

and:
More the Merrier Monday

Sunday, December 9, 2012

Sweet Snowman Pendant Necklace

 
Hey Everyone,

Here in New Zealand we have a Summer Christmas, so..... no snow!
But our warm Kiwi Christmas' are pretty awesome too...

One year, Sean and I were in England and we got to experience a white Christmas...and I even got to build my very own snowman.

So, today I have a cute, easy and fun holiday inspired pendant tutorial for you. 

  What you need:

2 large beads, seed beads, 1 headpin, a length of jewelry wire, a chain and pliers.

Following the steps laid out in the pictures, so easy!

Thread the 2 large beads onto the headpin,
Bend back to 90 degrees, loop back around with the pliers
and wrap the end of the headpin around and secure it with a gentle squeeze with the pliers.
Thread the seed beads onto the jewelry wire and secure the ends, I just looped the wire back into the last bead on each end.
Mould the scarf around your finger then wrap it around the snowman's neck and press into place.

Add a chain...
 
And there you have a really cute little snowman necklace...

These would make awesome hand made gifts or even Christmas ornaments for a little tree.


I really hope you are inspired to give this tutorial a go.... 

Are you giving handmade gifts this year?

If so, we would love to hear your ideas and what you're making.
 

Don't forget to follow us on Facebook,


Take care and have a great week

 xxx
 

Photobucket
and:


Tuesday, November 20, 2012

NorthShore Days Blogiversary Giveaway...

Today is my blogiversary - wow I know right, a whole year has just flown by ....

For my blogiversary I would love to reach 200 Facebook likes by the end of my day here in New Zealand....I'm soooooo close!

So please pop on over and like my NorthShore Days page and be in to win this awesome Winter bracelet, it would make the perfect Christmas gift....and I had so much fun making it.


Hope you're all having a fab day 

Take care


Photobucket

Sunday, November 4, 2012

Inspiration Series - Beautiful Butterfly Necklace

Hi Everyone,

If you haven't met me before, I'm Natalie and I blog over at NorthShore Days.

 I live on the beautiful North Shore in Auckland, New Zealand and I am so honored to be part of this great collaboration called Inspiration Cafe! I hope you will pop over and visit my blog when you can.

Here at the Cafe we have been chatting about "What Inspires" us...this week is my turn...

I guess there are a number of things that inspire me... I'm a "giver" always have been and always will be... I love it when I see happiness and joy on the faces of those that receive. People inspire me....
My family inspires me....I try to surround myself with happiness and positivity....that too, inspires me... to be happy and positive and to pass it onto others.

My passion is crafting and especially jewelry making.... I love to share my ideas and tutorials with everyone...

I am most inspired by nature and I try to incorporate it into my simple designs as often as I can.

So today I want to share a very easy statement necklace tutorial with you all.

 I can't tell you how much fun I had creating this necklace... its so simple to make and so rewarding to see the finished results.

What you will need for 1 necklace:

A Pendant, Long Headpins, Beads, Chain, Jump Rings and a Clasp
 A pair of long nosed pliers and a pair of round nosed jewelry pliers.

If you don't have jewelry pliers, then just use the long nose pliers, your links won't be as rounded but that's okay!

How to Make the Necklace: 
(following the step by step photos)

1. Choose the beads you are going to use and lay them out.

2. Make sure you have enough headpins for the number of beads you will use.

3. Thread a bead onto a long headpin.

4. Bend the headpin at a 90 degree angle, on both sides.

5. Using the round nosed jewelry pliers bend the headpin back around to form a loop.

6. Repeat for the other side. Then make up all the beads and headpins

7. Attach the beads together by gently opening a loop and slipping onto the loop of the next bead. Alternating with pieces of chain cut to the length you like. There is no rhyme or reason to the design so have fun...

8. I attached my Pendant onto a jump ring, linking two beads.

9. Measure the beaded part of the necklace to ensure both sides are even. I like to make necklaces to measure 55cm (21.5 inches).

Attach chain to make up the required length and add the clasp.

10. Enjoy your new necklace
So pretty right? 

I have to admit I'm quite enamoured with it....


The necklace turned out so well that I just had to make another one, in beautiful Autumn colors
  
 I've actually ordered more of these pendants, just because I love them so much....
 I hope you are inspired to try your hand at one of these super simple necklaces...

Take care,have a fab week and thank you for stopping by the Cafe.
See you again very soon.

xxx

Photobucket 


and:

TDC Before and After